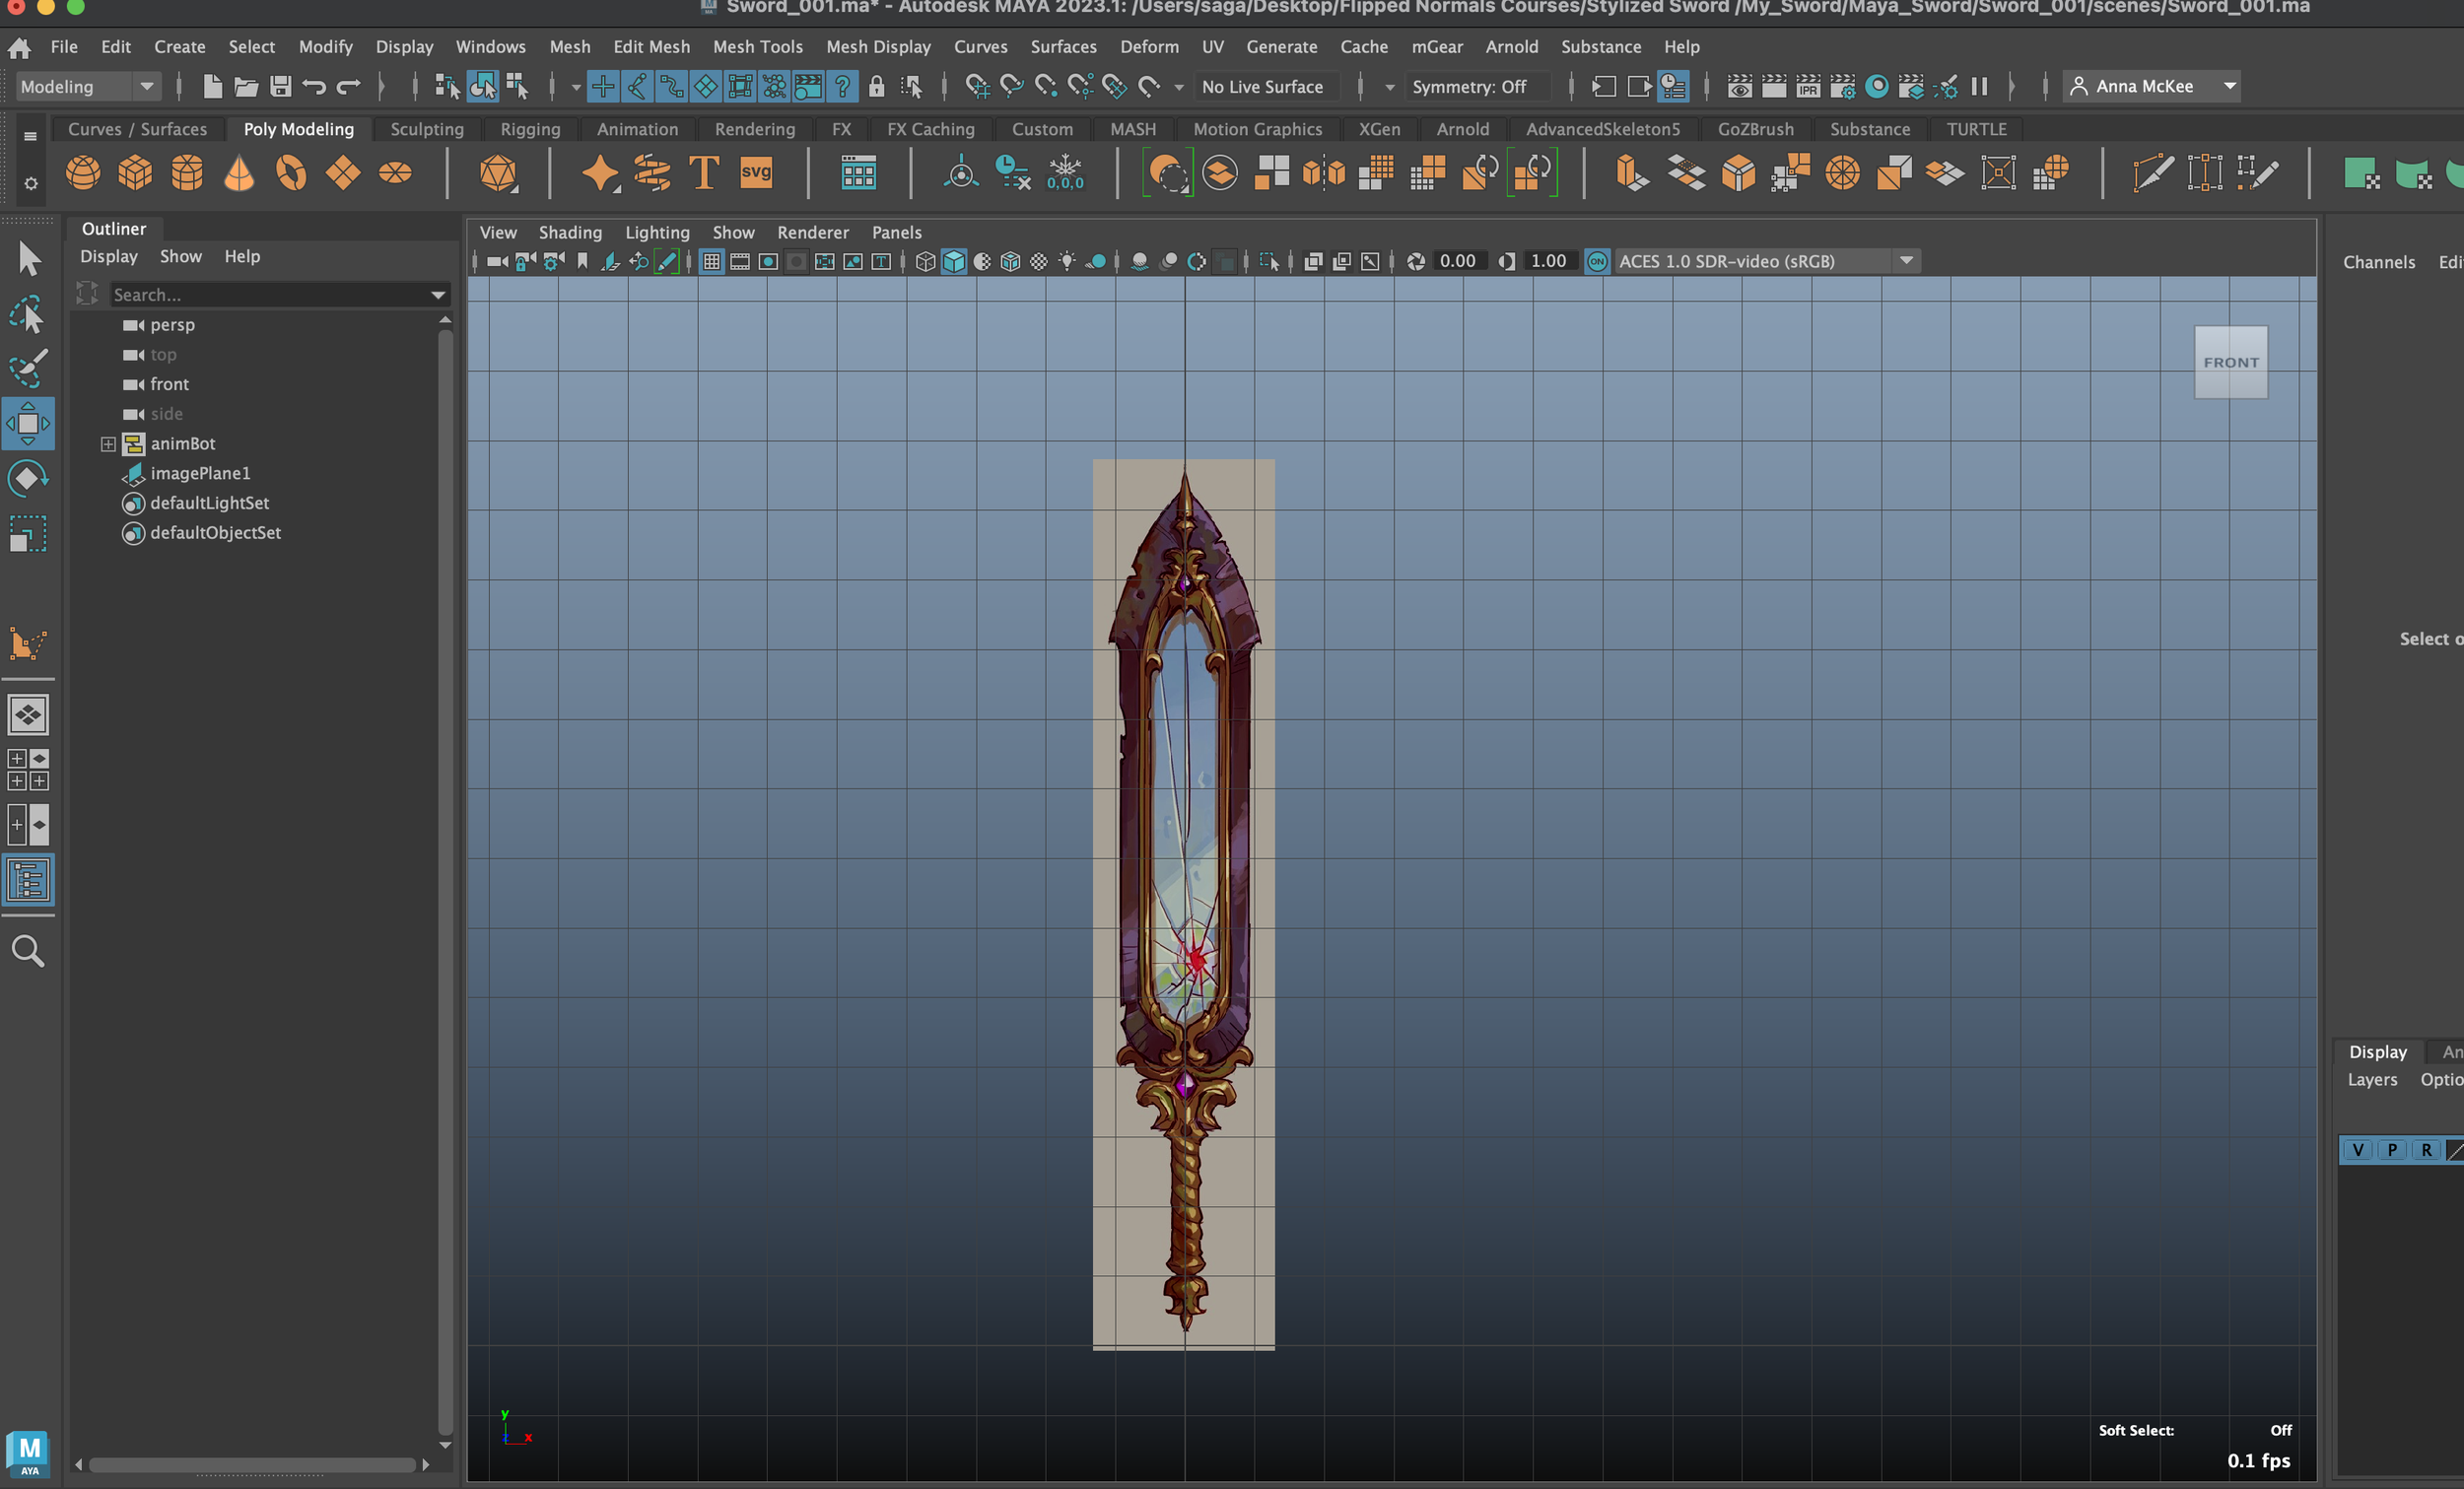
Course Preparation

After deciding to pursue a Masters degree in “3D Computer Animation”, I began to research the history, theory and practical elements of 3D Modelling and 3D Computer Animation.
This began a continuous cycle of completing external tutorials through websites such as YouTube and Flipped Normals.
Course Preparation:
1st March 2022 - 9th October 2022
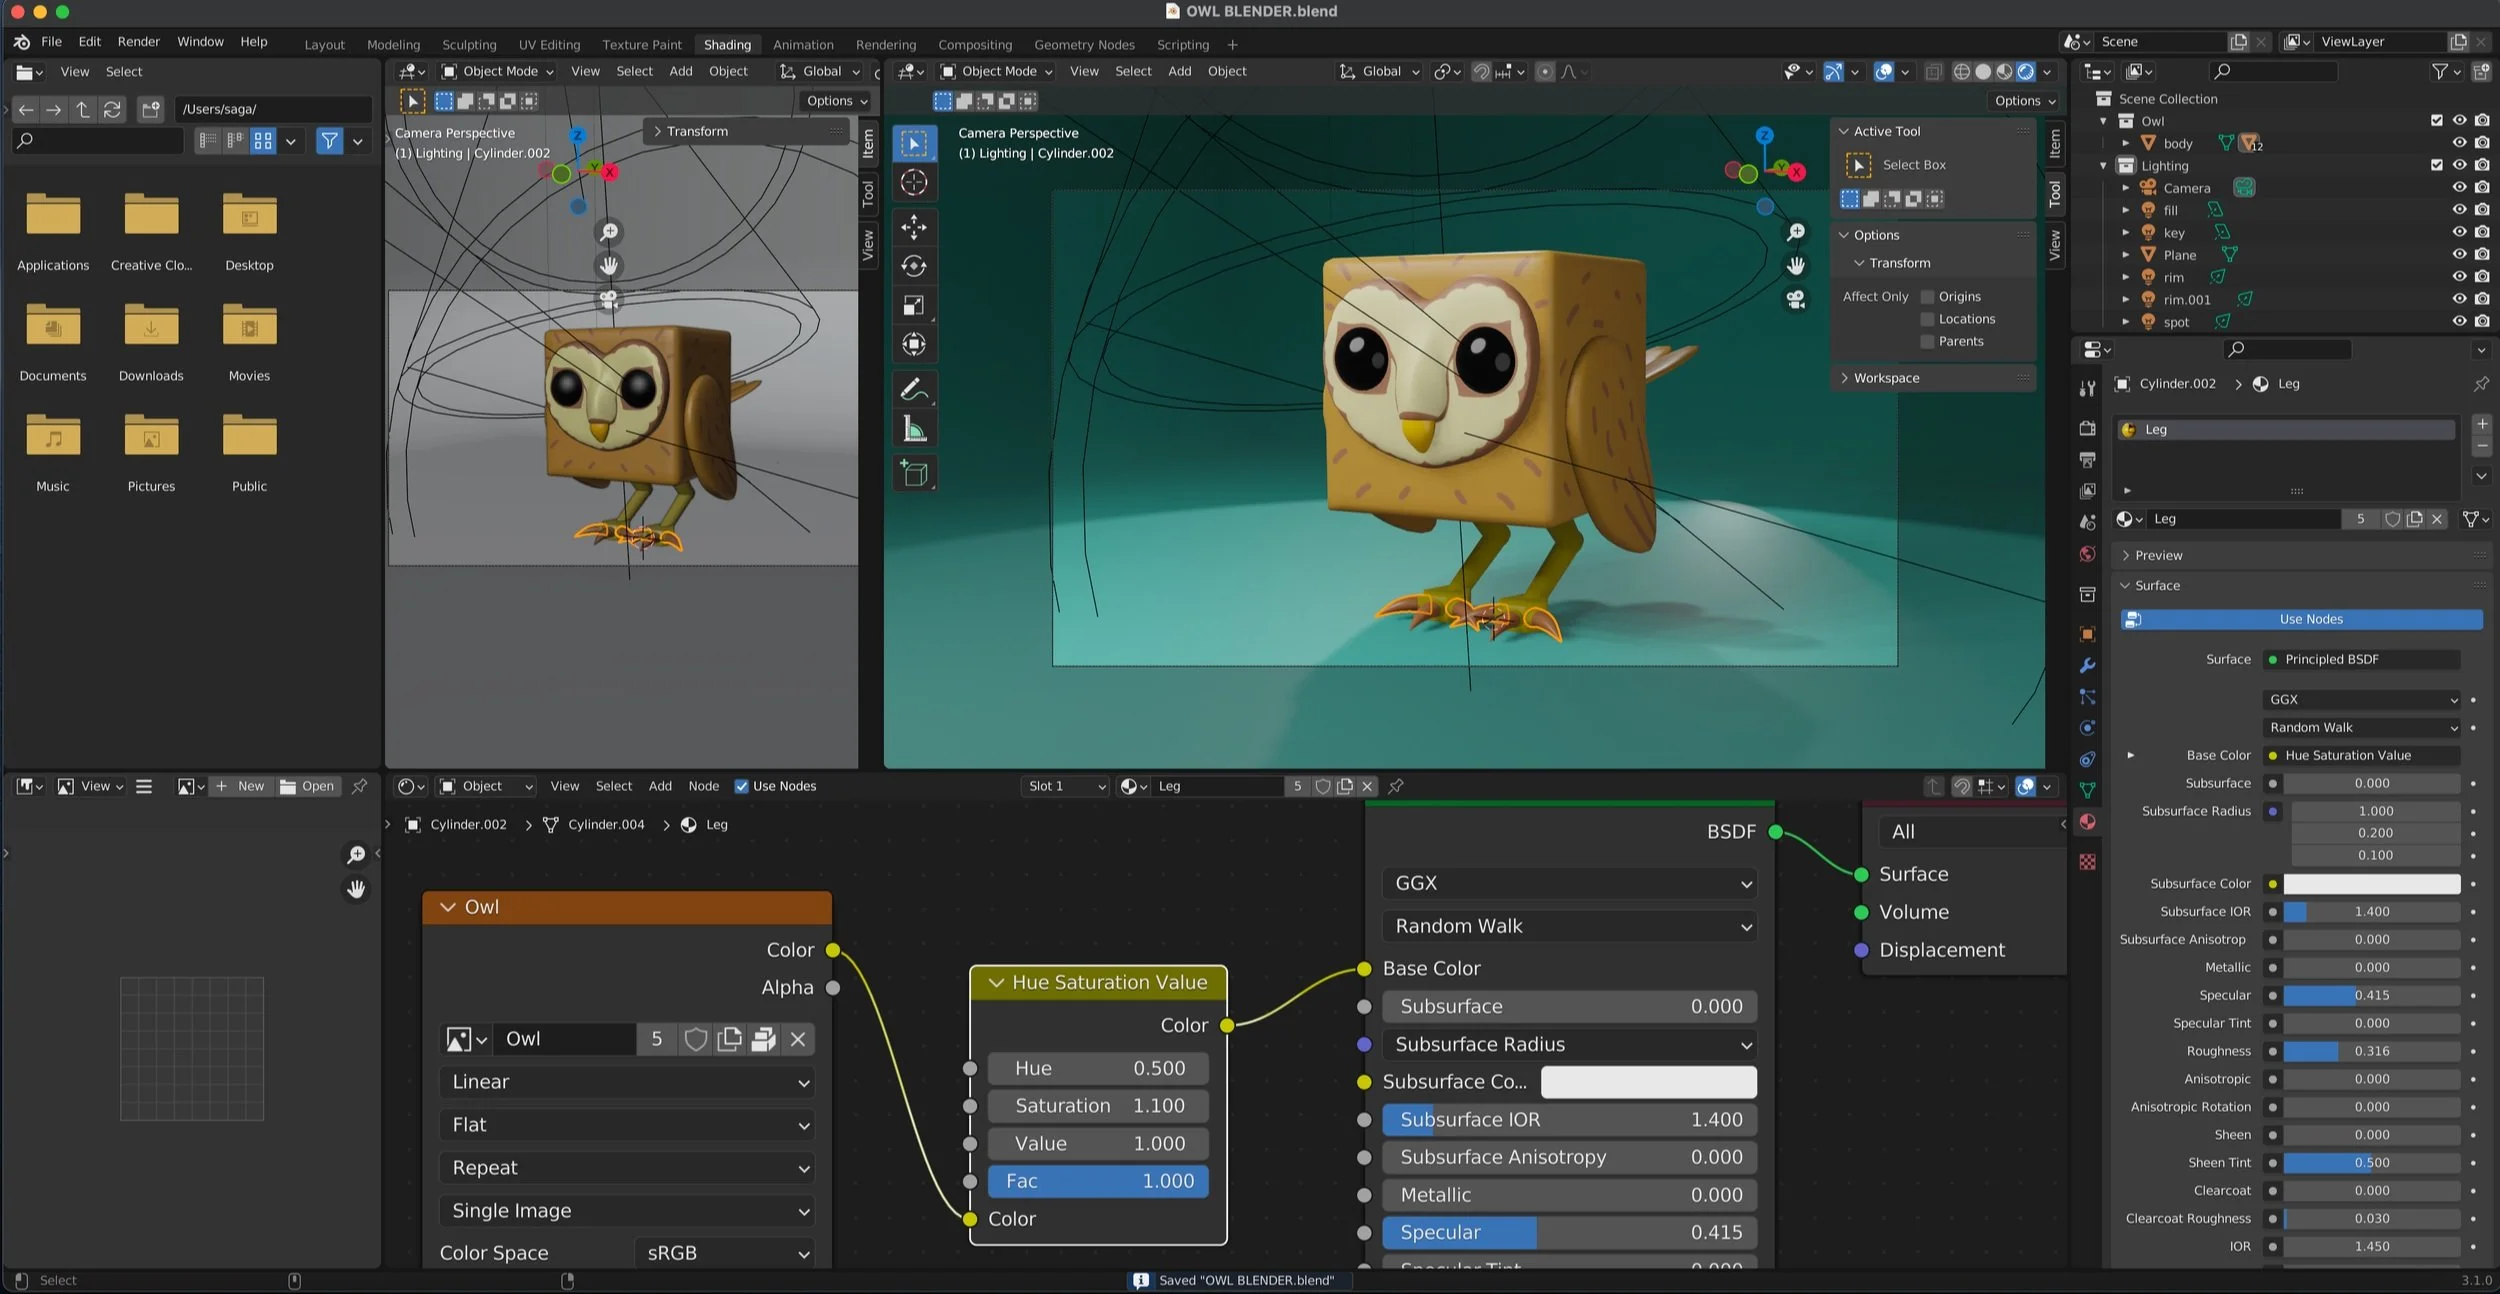
“3D OWL”- EXTERNAL TUTORIAL
Tutorial completed: 30th March 2022
Rendered: Eevee
Software used: Blender, Adobe Photoshop
Personal Difficulty Level: 8/10
Starting with the simple “Blender Blocking Tutorial - Owl Character”, from the Youtube channel “Blender translation and subtitles”, I began my journey in to the realm of 3D modeling.
This “3D Owl” was my very first 3D tutorial that I completed.
I decided to select this tutorial because I wanted to challenge myself to learn the basics of Blender, while also creating a model that related to my passion of Barn Owls and birds in general.

“3D Owl”
GIF made with Adobe Premiere pro
Topics covered within the tutorial:
Using Primitives
Blocking
Hard-surface Modelling
Organic Modelling
Subdivision Surface Modifiers
Mirror Modifiers
Shading
UV unwrapping
Using nodes to add colour / material effects
Basic still camera setup
3 Point Lighting
Eevee Render Engine
Topics covered myself when pushing the tutorial further:
Parenting camera to an “Empty”
Keyframing (adding rotation)
Changing size / style of backdrop
Post-Production Editing
Credit: Youtube Channel - Blender translation and subtitles
Tutorials- Blender Blocking Tutorial All Steps for Beginners 1/4
Blender Modeling Tutorial All Steps for Beginners 2/4


“Although I felt that this tutorial was a challenge, it was a great ‘first step’ into my 3D modelling journey. ”
Once I had finished the owl tutorial, I wanted to expand my skills and knowledge within the area of adding a rotating camera to my Blender project.
This step involved learning how to parent the camera to an “Empty”, which I did find tricky to complete as this was a ‘first’ for me.
Music Credit - Daft Punk - Around the World
Self Critique:
Although I did struggle with this tutorial, I do feel proud of myself that I was able to complete the model from start to finish. There were many instances within this 3D creation process that I did have difficulty with, such as the use of “Bevel Tool” during the Hard-Surface modelling process. I found this process hard to master as it was the first time I had ever used digital tools with such complexity as this.
If I were to follow this tutorial again, I would try to put my own ‘twist’ and ‘personality’ within the final model, such as changing the direction of the colour-scheme of the owl. For example, instead of using a light brown (depicting a Barn owl), I could have used a white cube instead (to reference a Snowy owl).
Another point of self-critique I would like to improve on, is my ‘Over-reliance’ on using the tutorial. I feel that I could have improved my own modelling skills if I had used more of my own initiative instead of staring into my computer screen and pausing the tutorial video every 2 seconds.
Conclusion:
Overall I found this tutorial quite difficult to follow, as it was my very first attempt using any 3D programme.
Although with further practice within the area of 3D modeling, I feel that if I were to retake the tutorial I would be able to grasp a stronger understanding of the complexities related to Subdivision Modeling and UV Unwrapping.
“Walking Glass Robot”- External Tutorial
Tutorial completed: 13th April 2022
Rendered: Eevee
Software used: Blender, Premiere Pro, Adobe Photoshop
Personal Difficulty Level: 9/10
The “Walking Glass Robot” was my very first animated 3D tutorial.
I selected this tutorial because I wanted to challenge myself, as I knew that I had decided to pursue a Masters in “3D Computer Animation”, therefore I knew I would need to start to become familiar with at least some of the rigs / animation tools / keyframes within industry specific 3D programmes. Therefore completing this tutorial felt like the best way to gain useful insight into the basics of a repetitive / robotic animation.
After I had completed the tutorial for the “Walking Glass Robot”, I then decided to push the animation further by adding in textures, UVs, nodes, lighting, cameras, keyframes, sound effects and video editing.
This process of extending the tutorial by utilising my own skill set from a “Multimedia Designer” perspective was overall quite tricky and unsuspecting. This is because I had never previously combined the use of robotic / mechanical footsteps along with a fully-rendered Blender scene. This meant that I had to edit specific sound effects and place them within "Adobe premiere Pro’s” audio timeline, making sure that each footstep matched the distance the robot was from the camera and the conclusive timing of its footsteps.
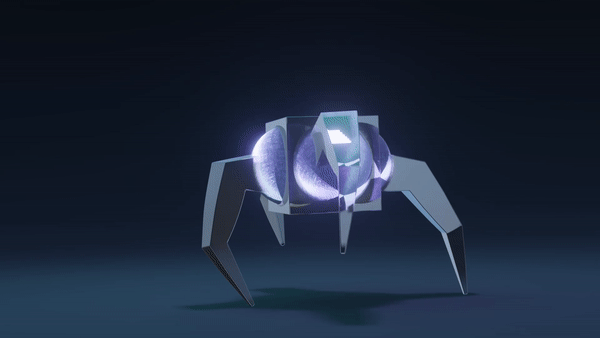
Using Adobe Premiere Pro to create a short GIF of the
“Walking Glass Robot”.
Topics covered within the tutorial:
Hard-Surface Modelling
Mirror Modifiers
Setting up an IK Rig
Creating a Motion Path
Direction Controller setup
Animation
Using the Graph Editor
Keyframing
Topics covered myself when pushing the tutorial further:
Parenting camera to an “Empty”
Adding in a background
UV unwrapping
Using nodes, shaders and UVs
Sound editing
Multi Coloured lighting setup
Creating Emission within the Glass Robot
Post-Production Editing
Credit: Youtube Channel - Polyfjord
Tutorial - Animate a Character in 15 Minutes in Blender


“I wanted to push the tutorial further; utilising shaders, camera parenting, sound engineering and video editing. ”
Final Video - “Walking Glass Robot”
Video shown above contains the finalised audio
Viewport Shading and Rendered View - Side by side comparison
Self Critique:
Personally, I feel that I relied too heavily on the tutorial video when it came to using the “Graph Editor”. This is because I was pausing the tutorial every few seconds, as I did not want to make a mistake with the animation process.
I feel that my own animation skills would have been strengthened if I had pushed myself to question, “Why am I using the Graph Editor, and what would happen if I deviate from the rules of the tutorial?”. Maybe if had followed this advice, I would have gained more knowledge around important aspects of the animation field.
There are also areas of the Robot’s legs that are not shaded properly and have not achieved the ‘Glass-like’ texture that I was aspiring to replicate, (although shading was not covered within this tutorial, I feel that I could have carried out more research into this aspect).
Conclusion:
After the completion of this short animated tutorial, I felt that I had gained a heightened awareness of the “Graph Editor”, as it was a key piece of technical information covered within this video tutorial.
Although I am not comfortable as of yet when using the graph editor within Blender, I feel that it was an important area to cover, as within my current “MA 3D Computer Animation” course, we eventually will be covering more complex animation tools such as the “Graph Editor” during our studies.
This was definitely a difficult tutorial to complete, especially when creating the IK Rig and walk cycle. These two areas for me were extremely complex, although the video clearly explained the use of each method and how the same principle idea can be applied to a range of animation pipelines.
In conclusion this tutorial pushed me to my technical limitations, whilst also challenging my beginner’s skill-set within the animation field.
“My goal for the future is to be able to create a similar animated walk-cycle (ie, robot, bird, human) and apply my own knowledge to this area without the use of a tutorial video needed. ”
“Donut” - External Tutorial
Tutorial completed: 22nd April 2022
Rendered: Cycles
Software used: Blender, Premiere Pro, Adobe Photoshop
Personal Difficulty Level: 7/10
This 3D “Donut” was a personal challenge that I set myself, as I had previously heard of the popular Blender “Donut” tutorial made famous by 3D Pro Artist / YouTuber “Blender Guru”.
Initially this “Donut” tutorial attracted my attention as it was seen as a ‘Right of Passage’ within the online 3D Art community. Therefore I wanted to see how I would personally cope with the difficulties of the 3D pipeline process.
The tutorial itself was a fantastically detailed course, as the video producer “Andrew Price” (Blender Guru) made the point to specifically utilise the majority of Blender’s industry-standard toolkit. Within the “Donut Tutorial” videos, Andrew also made sure to cover each aspect of the 3D modelling pipeline, from sculpting all the way to using Geometry Nodes to create an animated VFX backdrop.
As this was my third 3D modelling tutorial I was still unsure about using all of the tools and processes within Blender, although I felt that “Blender Guru” explained each of these pipeline processes extremely well.
For example within the tutorial, if the next step was to ‘Open up the Geometry Editor’, we were then informed why we were completing this action and the technical implications of proceeding with this task. We were also communicated the historical uses of this process and how using the “Geometry Node Editor” would help us to achieve stunning results within the VFX and 3D Modelling industry.

“Donut” GIF created with Adobe Premiere pro
Some of the topics covered within the tutorial:
Introduction to tools within Blender
Keyboard shortcuts
Organic Modelling
Shrink / Flatten - Move along Normals
Applying Scale
Subsurf Modifier, Shrink Wrap Modifier
Smooth tool / Inflate Tool
Weight Painting
Materials
Using references
Textures - Texture Paint, Node Wrangler, Noise Texture, Mix Shader
Bump Map, Bump Height
UV Mapping
Geometry Nodes - Join Nodes, Instances, Increase Density, Math Node, Poisson, Circle Packing, Vertex Groups, Random value Node, Rotate Euler Node, Divide Calculation, Converter Colour Ramp
Lighting - Fill Lighting, Check Light Exposure, Rim Lighting
Compositing - Background Colour, Gradients, Specular Glow, Colour Grading, Chromatic Aberration, Sharpening, Isolating the Glow
Rendering - Cycles, Noise Threshold, Motion Blur, Persistent Data, Light Paths, Eevee Rendering Setup, Contact Shadows, Screen-Space Reflections, Ambient Occlusion
Animation - Graph Editor
Camera Framing
Keyframing
Topics covered myself when pushing the tutorial further:
Adding music
Video editing
Post-Production Editing
Credit: Youtube Channel - Blender Guru
Tutorials - Blender 3.0 Beginner Tutorial - Part 1 ⁓ Blender 3.0 Beginner Object Editing Tutorial (Donut part 2)
Blender 3.0 Beginner Modifiers Tutorial (Donut part 3) ⁓ Blender 3.0 Beginner Modelling Tutorial (Donut part 4)
Blender 3.0 Beginner Sculpting Tutorial (Donut part 5) ⁓ Blender 3.0 Beginner Rendering Tutorial (Donut part 6)
Blender 3.0 Beginner Texturing Tutorial (Donut part 7) ⁓ Blender 3.0 Beginner Texture Painting Tutorial (Donut part 8)
Blender 3.0 Beginner Geometry Nodes Tutorial (Donut part 9) ⁓ Blender 3.0 Random Color Tutorial (Donut part 10)
Blender 3.0 Beginner Animation Tutorial (Donut part 11) ⁓ Blender 3.0 Floating Particles Tutorial (Donut part 12)
Blender 3.0 Beginner Lighting Tutorial (Donut part 13) ⁓ Blender 3.0 Beginner Compositing Tutorial (Donut part 14)
Blender 3.0 Beginner Rendering Tutorial (Donut part 15) ⁓ Blender 3.0 Beginner Donut Tutorial Part 16 (FINALE)


“This tutorial allowed me to explore many aspects of the 3D pipeline within Blender”
Final Video - “Donut”
Self Critique:
Within the “Donut” tutorial video series, “Blender Guru” encouraged his audience to achieve their own style of donut, such as adding different colours of sprinkles, icing and bread. Although I did achieve a slightly unique-looking donut (due to the differences of colour choice within the sprinkles, icing and background), I did not change the colour of the bread or overall ‘style’ of the donut.
I feel that I could have modelled a completely different type of donut if I had more confidence within the general area of 3D modelling and VFX. Looking back now through the tutorial, it is clear that ”Blender Guru” encourages his participants to be original when thinking about their own donut design.
Conclusion:
After concluding this “Donut” tutorial, I felt a mixture of positive and negative emotions.
For example, I was pleased with my overall growth and general understanding of Blender’s UI, as this was my third Blender tutorial, allowing me to feel more ‘In-tune’ and ‘Responsive’ to the overall 3D programme.
Overall, I feel that the complexity of ‘Geo-Nodes’ is an area of 3D visualization that I would need to research and improve on. This is because during the “Donut” tutorial I felt most challenged and ‘out of my depth’ during the Geo-Nodes section of the video.
In conclusion, I know that with more practice and development within this area, I will achieve a heightened sense of understanding and gain further respect for the usage and practicalities of Geo-nodes.
“Goblin” - External Tutorial
Tutorial completed: 29th May 2022
Rendered: Best Preview Render (BPR)
Software used: Zbrush, Adobe Photoshop
Personal Difficulty Level: 7/10
This “Goblin” External Tutorial was provided by the company “Flipped Normals”, titled “Introduction to Zbrush”.
I decided to partake within this Zbrush tutorial as I wanted to begin learning an ‘Industry Grade’ Sculpting programme that would allow me to express my creative skillset.
As my previous educational background is within the area of Illustration, Life-Drawing and Fine Art, I felt that I would be able to grasp the concept and ‘flow’ of Organic Modelling more easily than ‘Hard-Surface modelling’.
For example, I feel more comfortable referencing human portraiture, anatomical studies and the styleisation of particular bird species. This is because many of my previous traditional commission paintings are themed towards a stylised human figure, flora and fauna.
After beginning this “Introduction to Zbrush” tutorial, I soon realised that my strengths are more situated towards ‘Organic Modelling’, as I feel that I am able to express my desire for small details, form and correct anatomy within a complex 3D programme. Using Zbrush for the first time was still extremely tricky, although the tools felt more intuitive than the previous programmes I had been using (Blender). After much practice and sculpting with Zbrush, it almost felt as if I were holding a physical paint-brush and/or sculpting with real clay, overall making the programme a joy to use! Although this “Goblin” would not be classified as ‘My style’ of artwork, (as I prefer artwork with a strong female lead), I still decided to pursue this tutorial and complete the task of making this "‘Goblin-like’ creature.
One day, i hope to have completely mastered the skill of creating beautifully-sculpted, stylised human-characters and birds within Zbrush, (for example, maybe recreating one of my 2D traditional paintings as a 3D organic model).
Some of the topics covered within the tutorial:
Interface, Navigation, Basic Tools
Saving: Project & Ztools
Transpose & Gizmo
Masking, Brushes
Polygroups, Dynamesh
Sculptris Pro
Dynamesh vs Subdivisions, Dynamic Subdivisions
Zspheres, Subtools, Alphas
Customizing the UI & Hotkeys
Morph Targets, Layers
Zremesher, Reproject
Polypainting
Vector Displacement Brushes (VDM)
ZModeler
Insert Mesh (IMM)
Live Booleans
UV Master, Morph UVs
Posing with Zspheres
Fiber Mesh, Decimation Master
Creating Maps
Import & Export files – UpdatingUV
Lighting/Rendering
Matcaps, PBR Filters/NPR
Timeline
Block-In of the Main Creature Shapes
Refining the Design
Refinement & Mid Frequency, Detailing with Alphas
Topics covered myself when pushing the tutorial further:
Adding lighting to the final render
Credit: Website - Flipped Normals
Tutorial: Introduction to Zbrush


“I felt more comfortable using my Organic Modelling skills as I have an illustrative background. ”
Final render - With lighting (Best Preview Render - BPR)
Experimental Renders


“I wanted to experiment rendering different light sources within Zbrush ”
Self Critique:
Although I thoroughly enjoyed creating this “Goblin” model, I feel that I would have liked to push the tutorial further by adding textures via “Substance Painter”.
The reason why I did not complete this process, was because I had not yet covered the topic of ‘Industry Standard’ Retopologizing with Maya, therefore I felt that the process might become overwhelming to learn within a constrained time frame. (I had also just received my offer to work as a 3D Artist, therefore after the completion of this “Goblin” tutorial, I had to slow down my pace of external learning tutorials due to my new work schedule).
I do feel that the “Sketch Toy Plastic” material that I assigned to the Goblin does help to create a unique-looking render, especially when combined with the blue lighting.
Conclusion:
Overall I was pleased with the general outcome of this “Goblin” model, as it allowed me to realise my strengths and transferable skills as an Illustrator pursuing a 3D Artist role.