Week 6 - week 7

My research / study surrounding Retopology and Texture Map Baking, including self-reflective thoughts.
Week 6 - Week 7
14th November 2022 - 27th November 2022
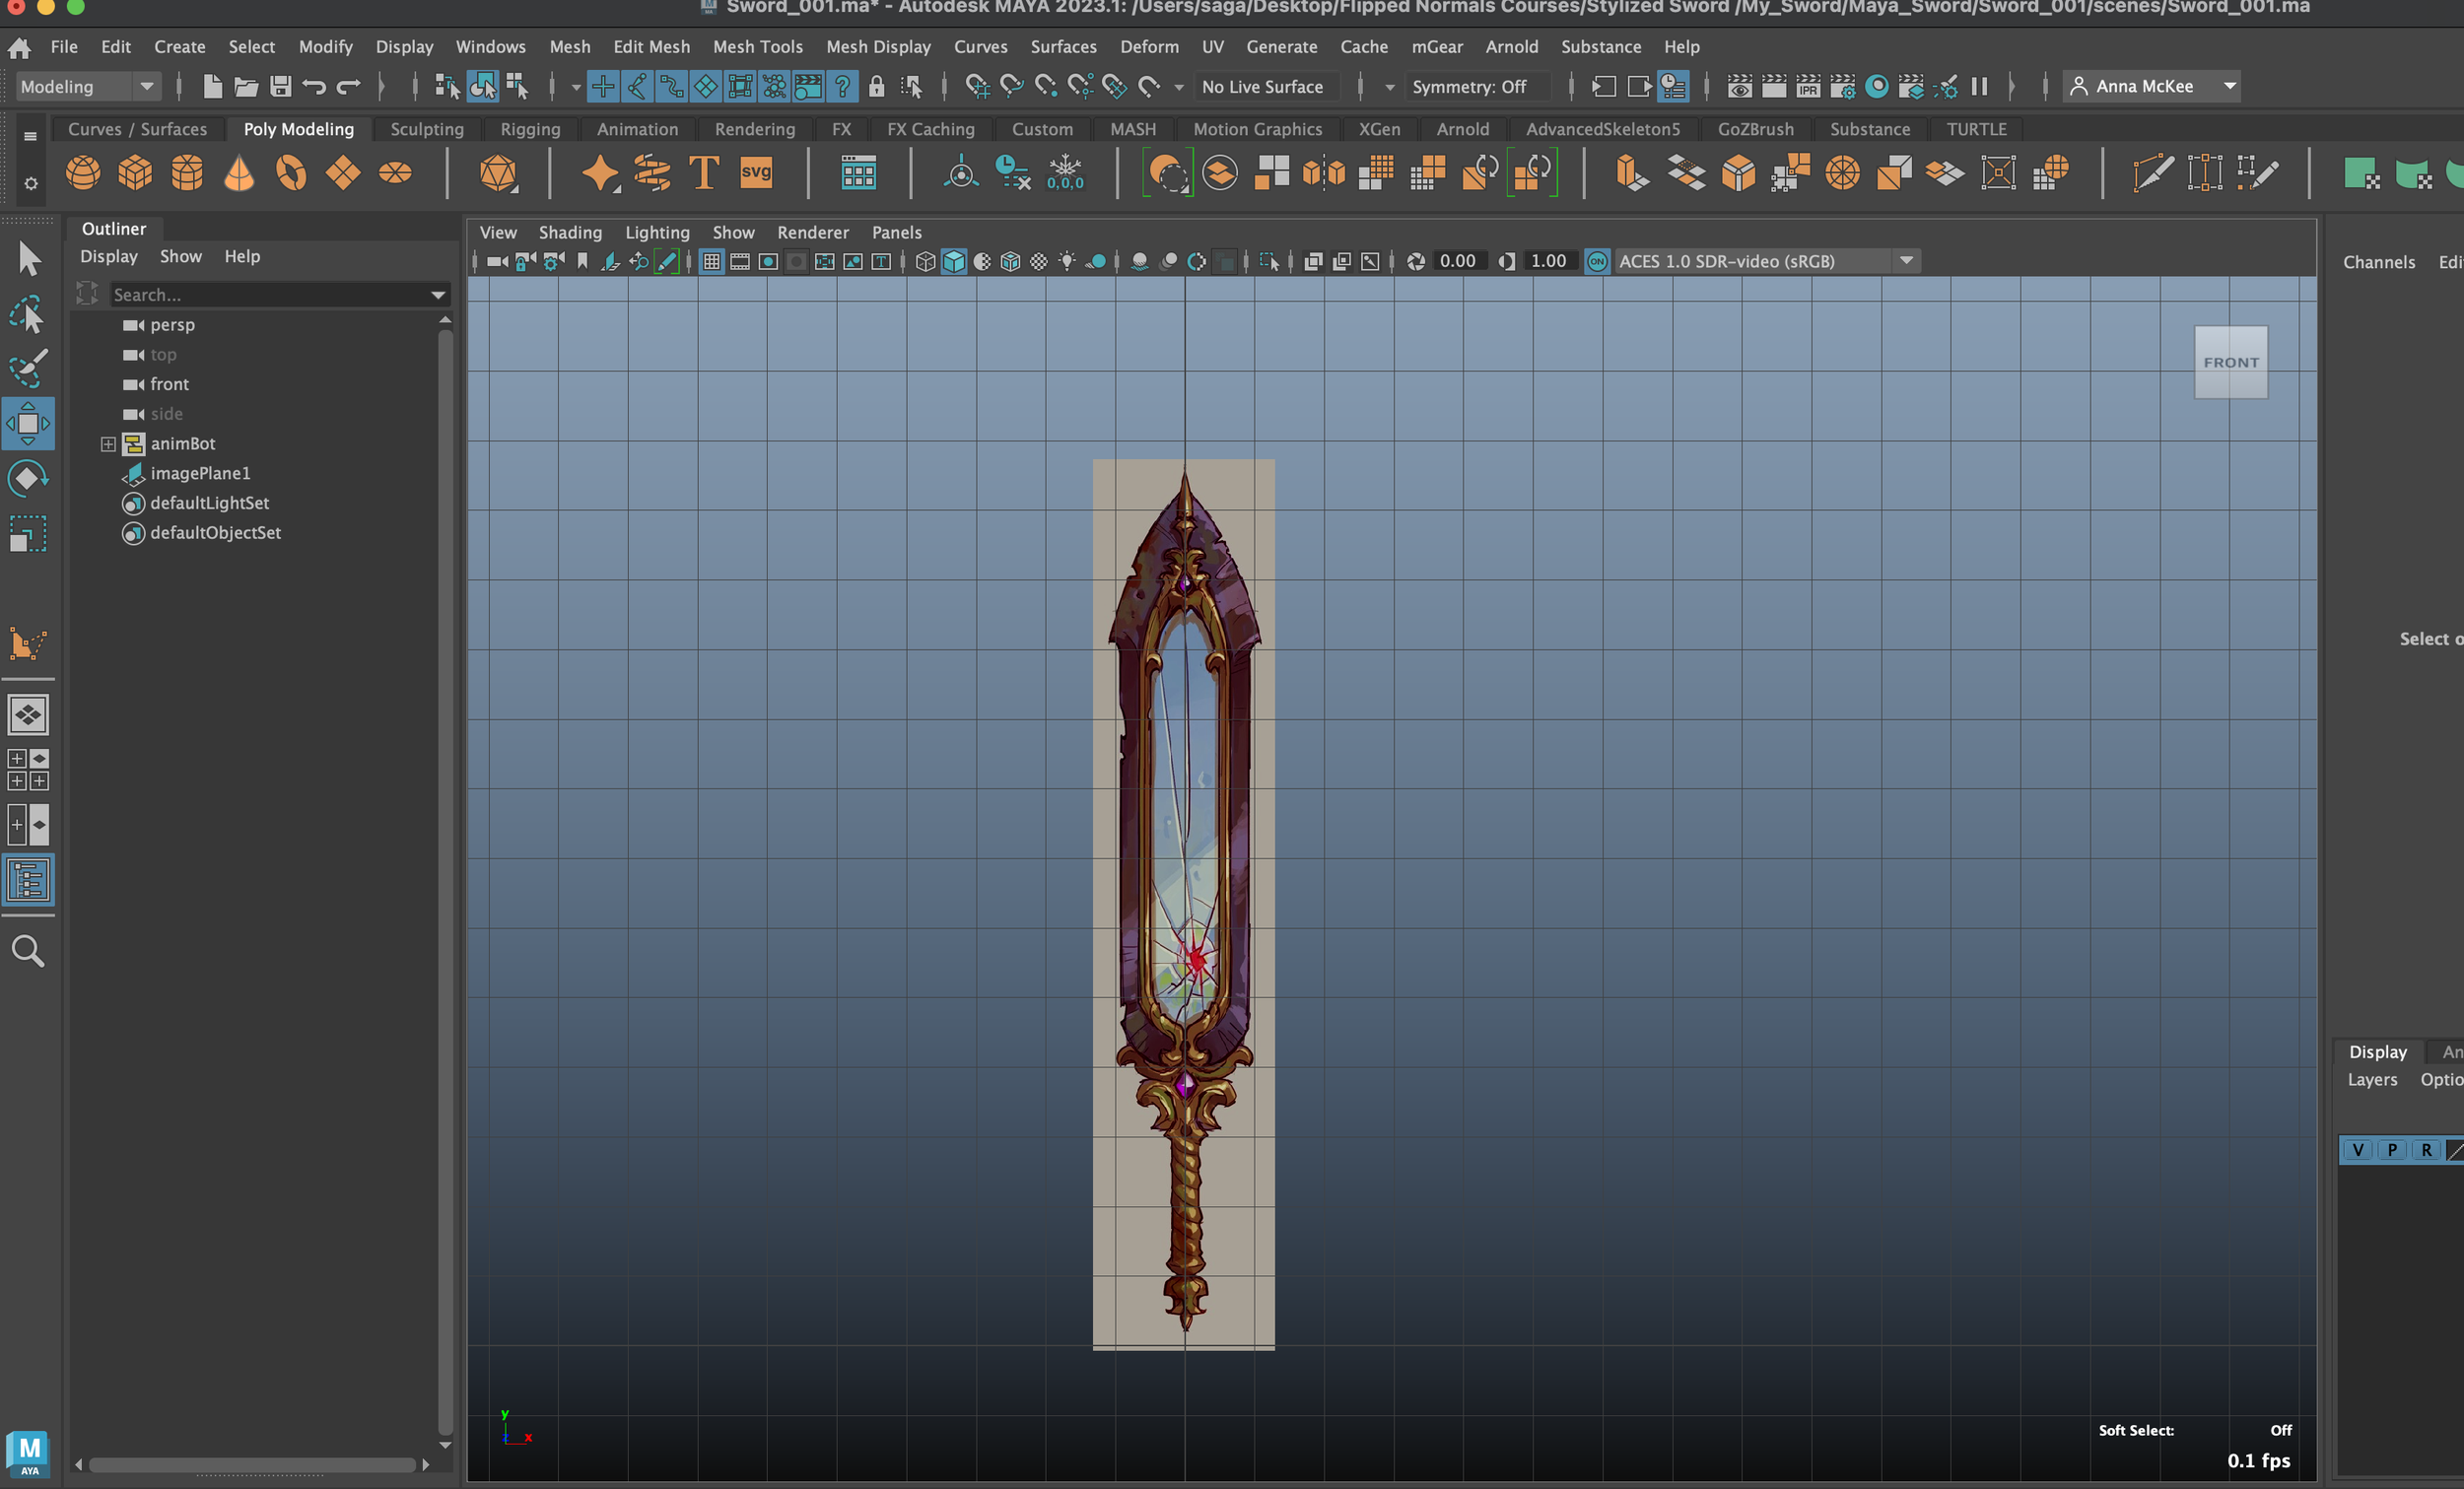
Internal Workshop - Quadraw - Easter Island Model - Credit: Anna McKee
Introduction to Retopology-
Week 6
14/11/2022 -
Today’s class began with an explanation of the “Why?” behind Retopology and the importance of generating efficient edge-flow.
What is the purpose of Retopology:
To generate a simplified mesh with a lower resolution that will allow the continuation of the 3D Pipeline to run smoothly, such as for the purpose of UV Unwrapping and Animation / Deformation.
For example, after creating an organic 3D sculpt it is important that we Manually Retopologize the model as the current topology of the mesh will be inefficient and extremely high res (high polycount).
This will cause problems further down the pipeline as the model would be difficult to UV Unwrap due to the high-res topology and uneven Edge-Loops, ( This could include “Spirals”, which are catastrophic to the integrity of the model and are difficult to rectify).
Efficient / clean retopology is also important when animating your model, as the mesh will need to deform, bend and stretch whilst maintaining its natural form.
For example, each of the joints within the human body will need to be able to deform correctly when animating, (elbows, knees, fingers, etc) as these joints provide a central ‘pivot-point’ of movement of natural movement.
This means that areas such as the knee will need to include topology with much higher density when compared to the forearms. The reason behind this is because the knee is a joint within the body that will deform when it bends, meaning that we will need to supply the topology with enough resolution in this area to allow it to bend correctly, whilst maintaining clean visual representation (ie, no ‘Pinching’ within the animation).
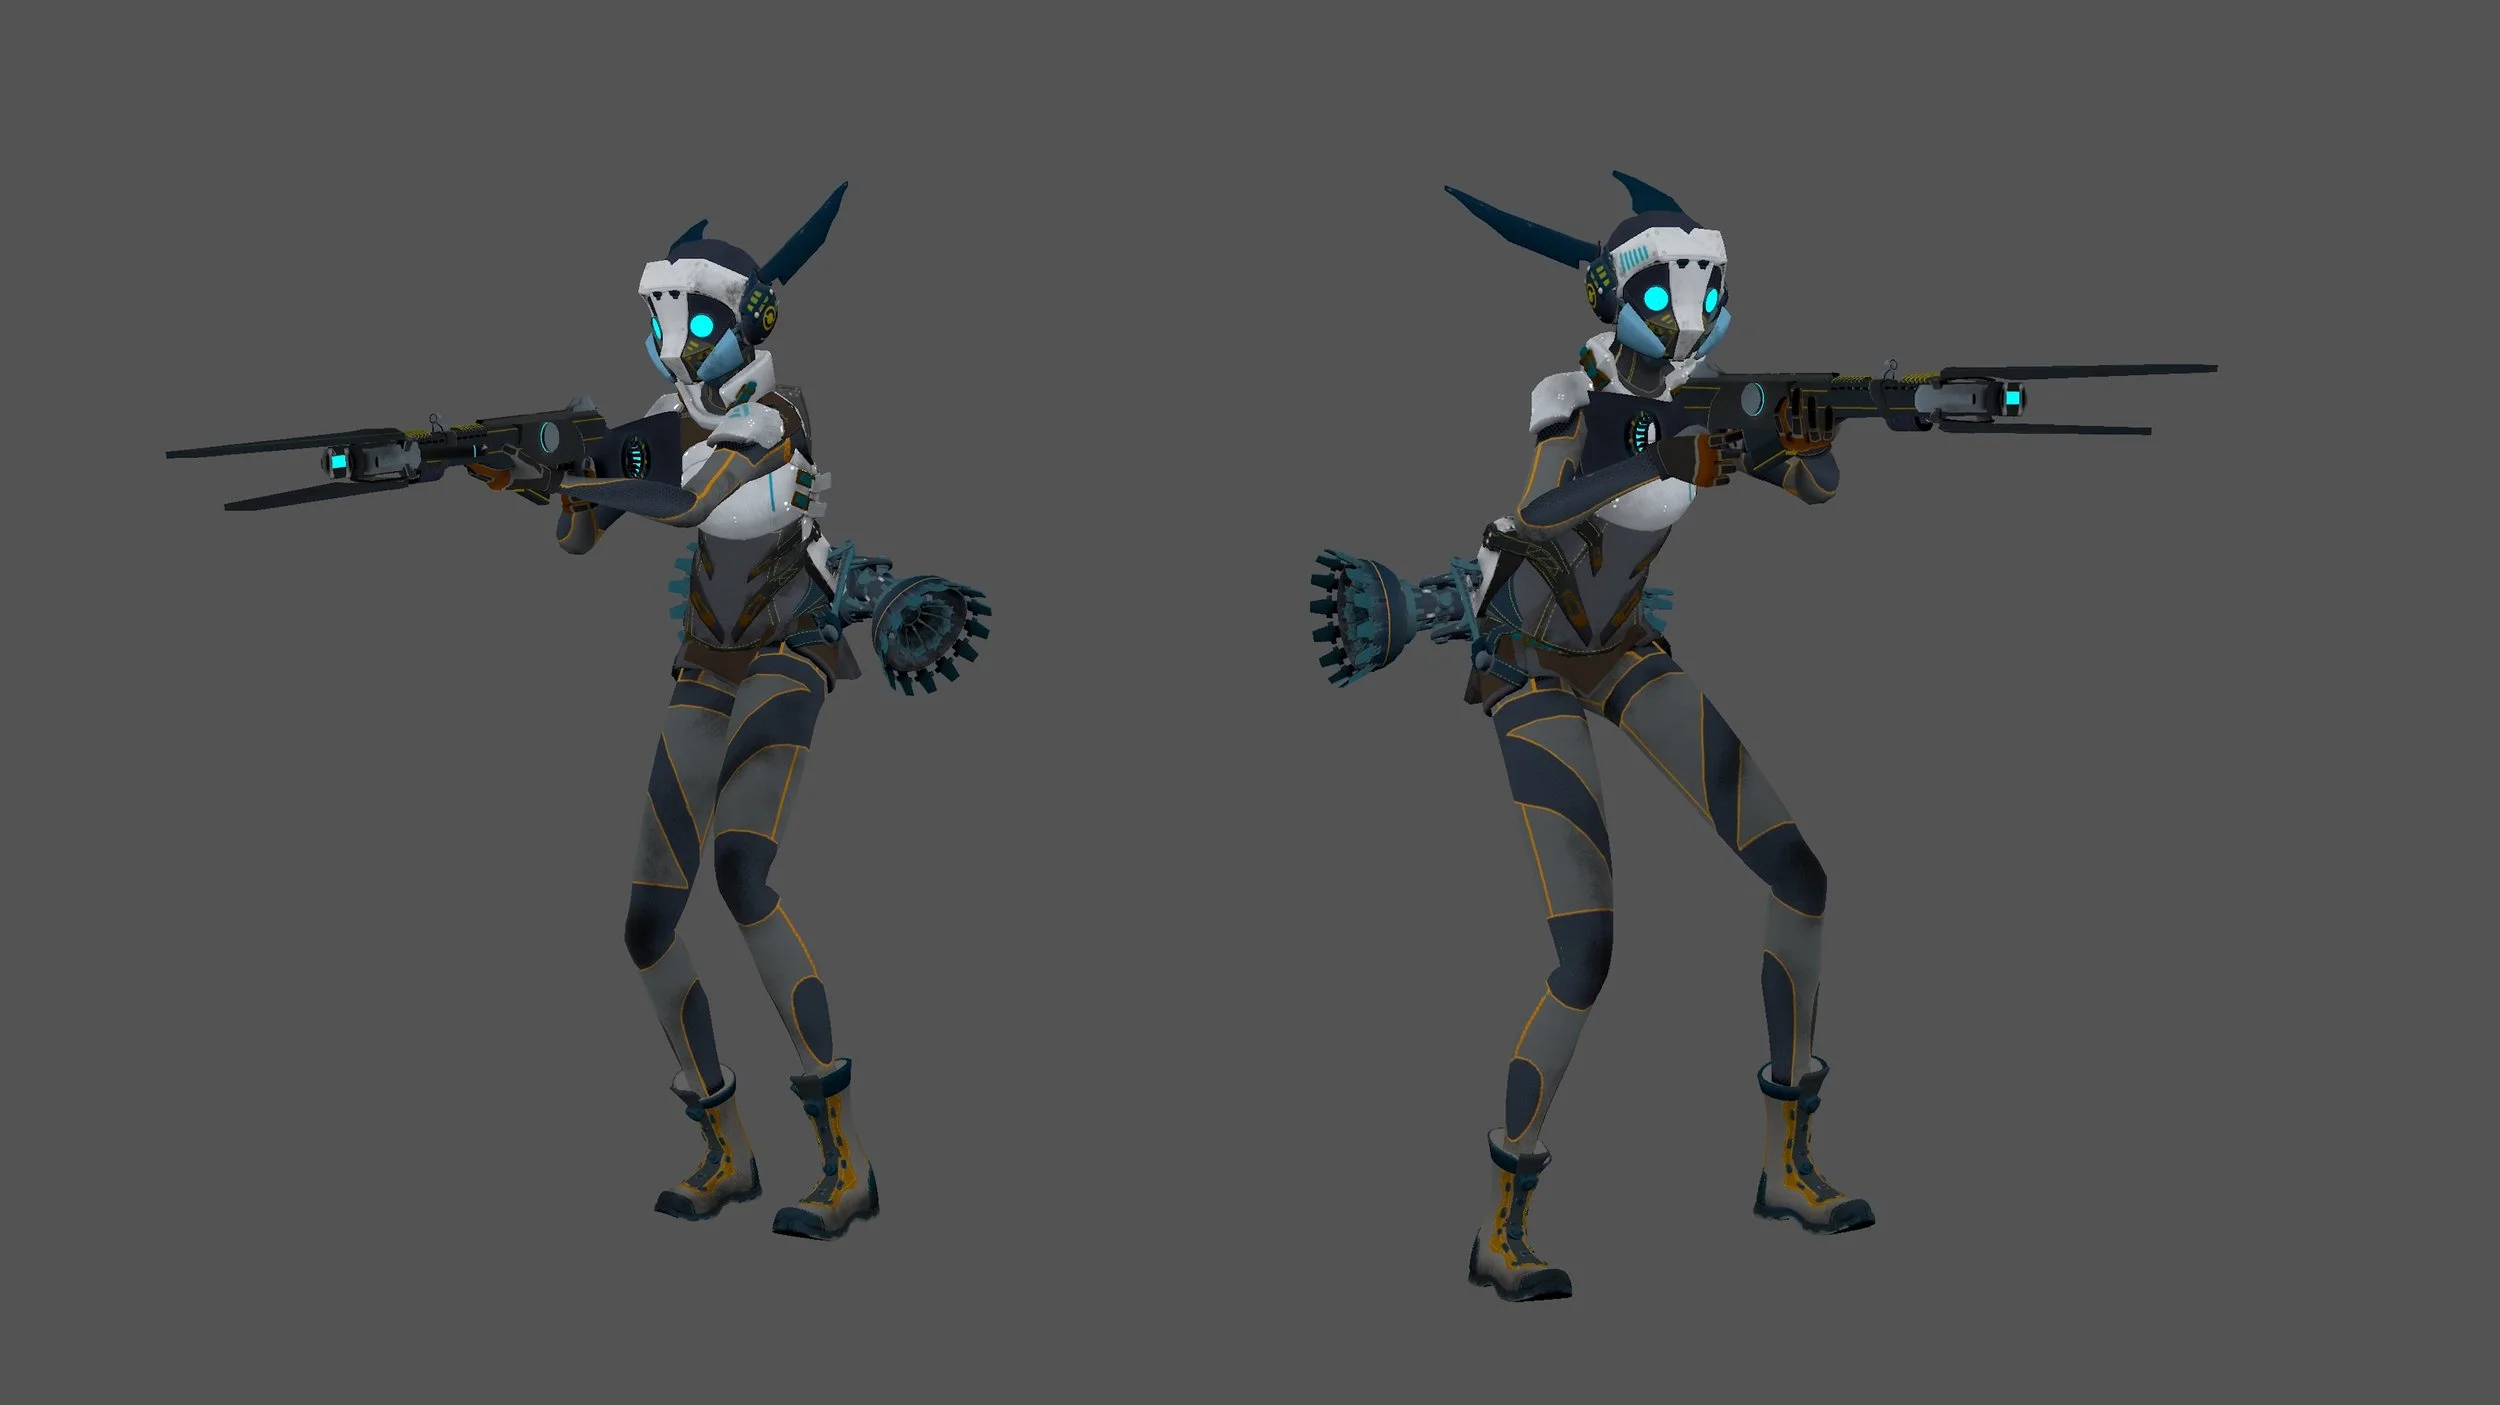
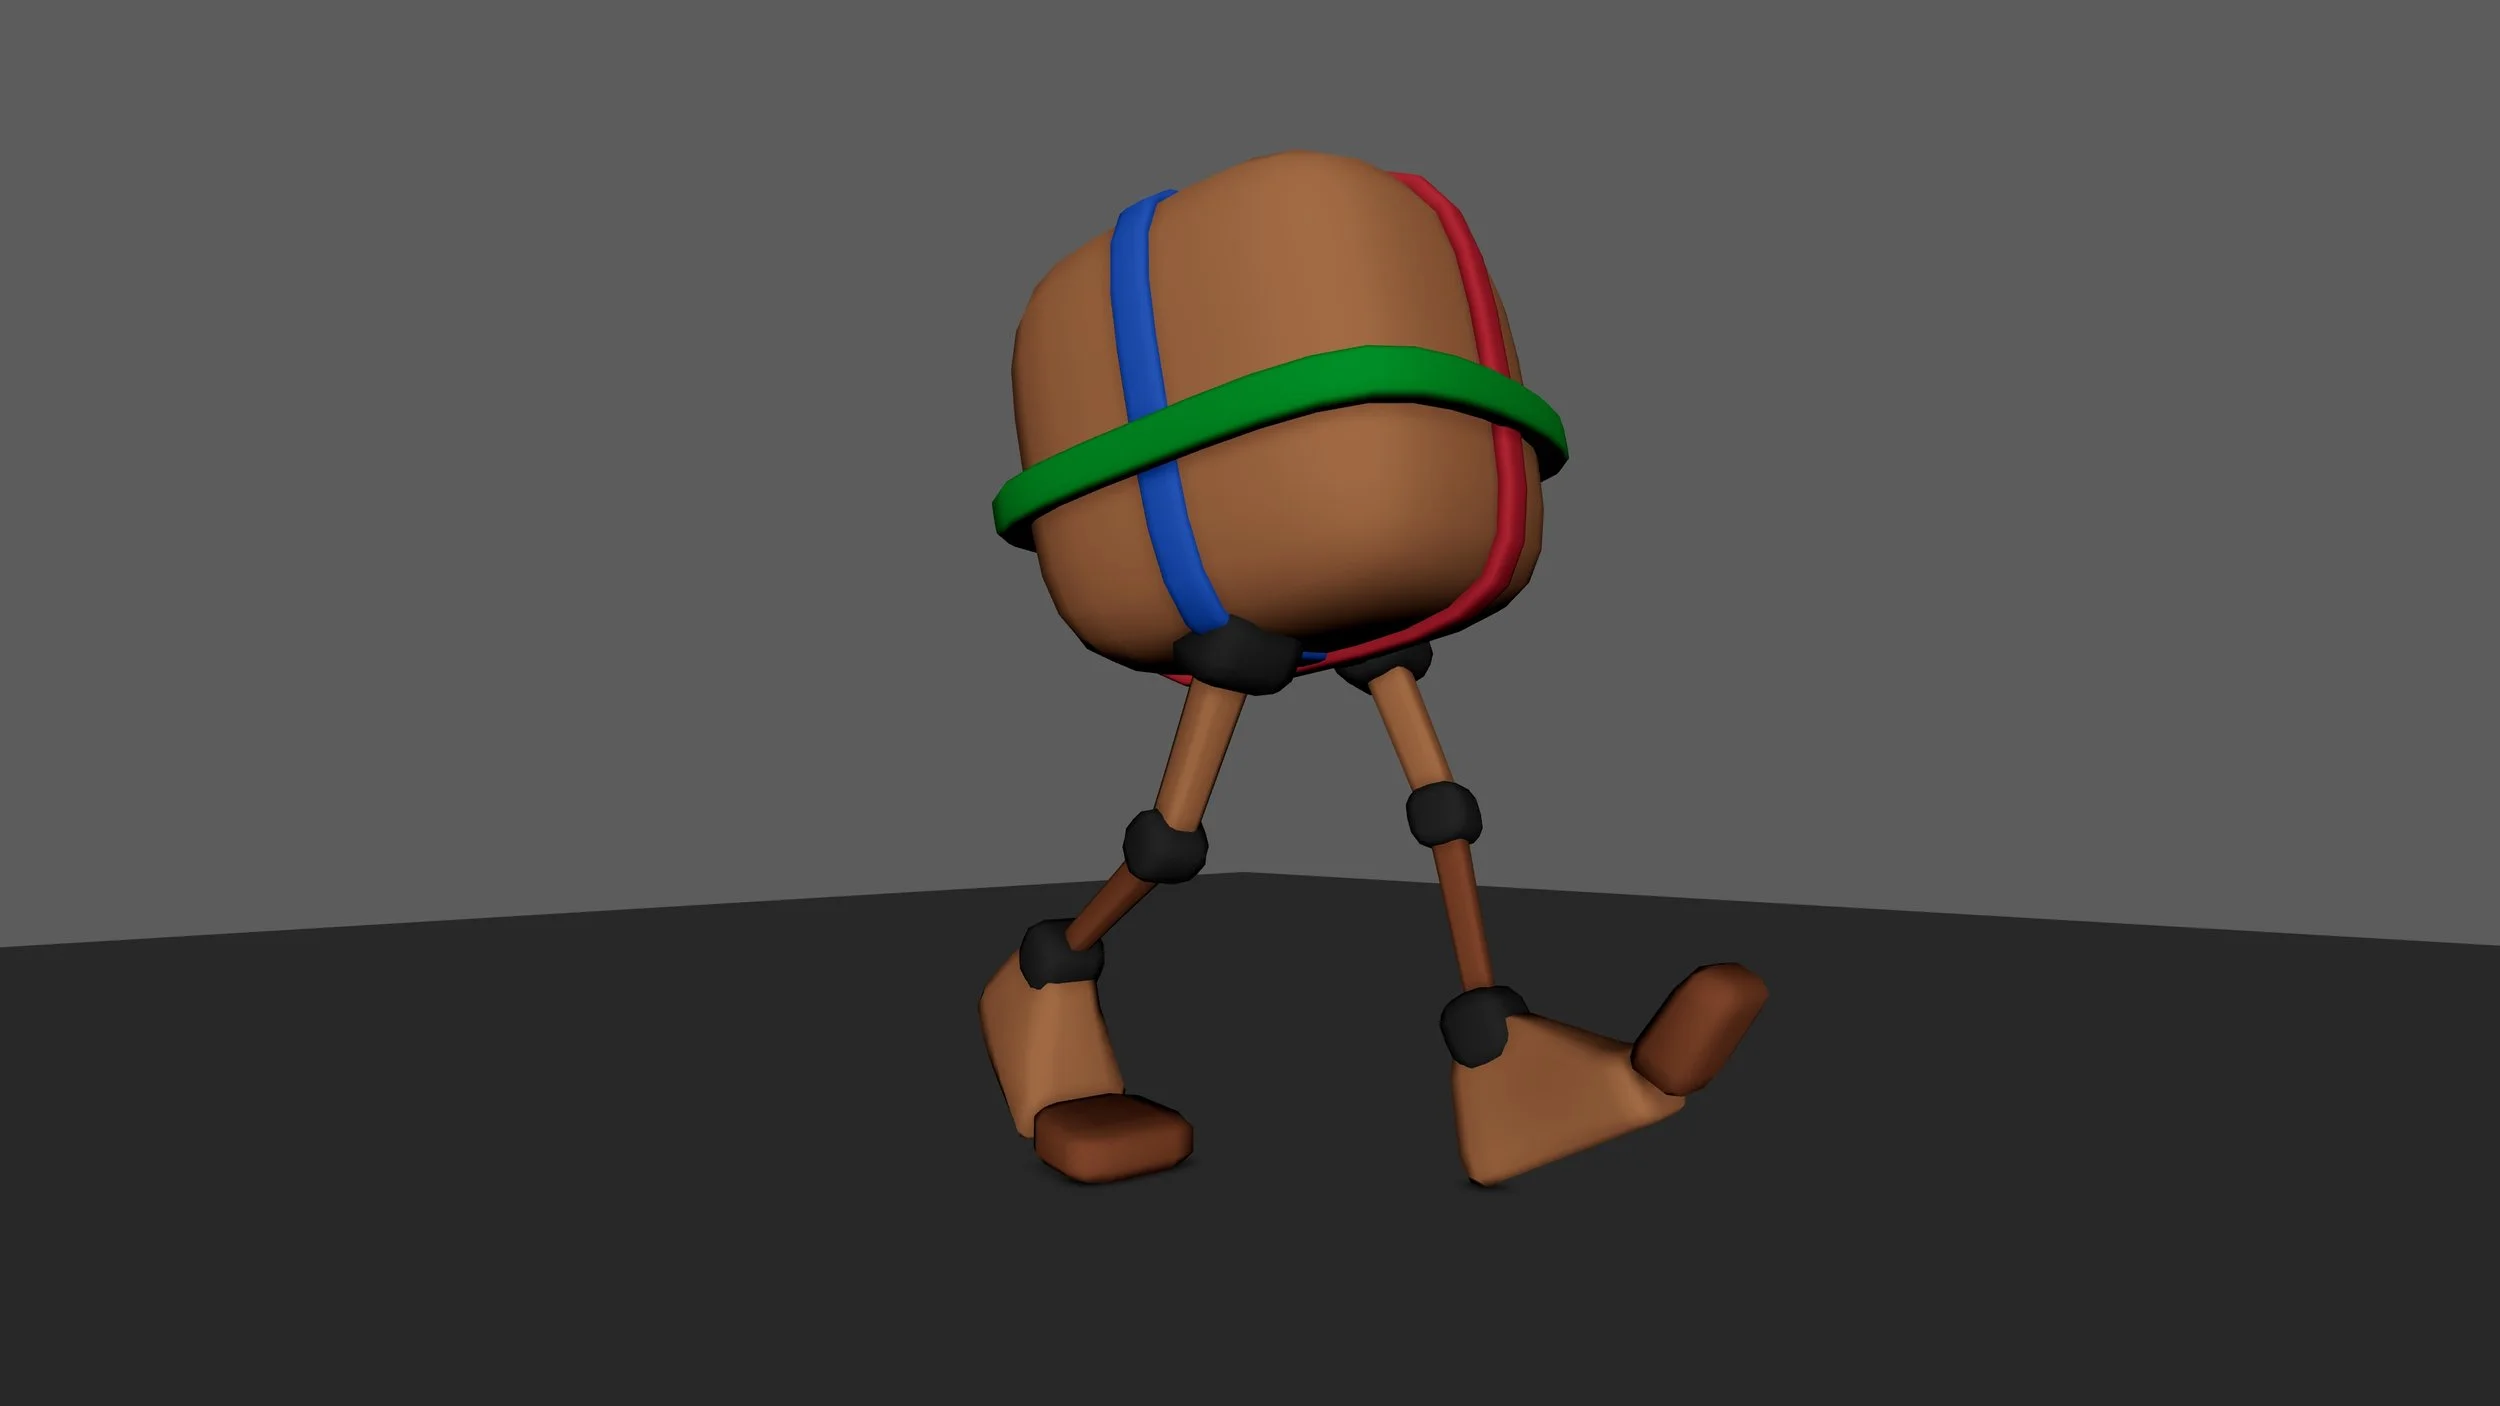
Examples of different topology deformations - Credit "Wunkolo"
Higher Density and Lower Density -
Week 6
Areas within the mesh that need to retain a higher density (for the purposes of clean deformation / movement of facial features and body joints):
List comprises of elements regarding a humanoid character -
Face - Eyes, Mouth, Nose
Knees - Popliteus Muscle
Elbows
Knuckles
Shoulders
Ankles
Areas within the mesh that can retain a lower density (for the purposes of reducing polycount and improving efficiency when rendering):
List comprises of elements regarding a humanoid character -
Back of the head
Forearms
Shins
Torso - depending on character design and movement
Thighs
Cheekbones
Forehead - depending on character style, wrinkles, etc
Soles of the feet
Class Notes - Retopology -
Week 6


Credit: Anna McKee
14/11/2022 -
The images shown above portray the notes that I recorded during class time, Monday 14th November 2022.
Personally I feel that creating these quick notes helped me to record important Hotkeys and challenging elements to remember within the area of Retopology.
Week 6 -

A vertex with more than 4 edges.
Stars / Poles are acceptable to use, and almost every model has them.
Even a professional, manually retopologized model will have multiple stars within it, as it is near impossible to only use quads due to the necessity to connect low-density mesh to high-density mesh.
Stars can create pinches when animating.
Stars are also commonly placed between the nose and eye, as this area provides less creasing = less deformation when animating.
It is acceptable to have Stars in a model, although it is important to place them in ‘hidden’ places such as behind the ear / soles of the feet, or somewhere that will be covered by clothing or an object.
Created using Canva - Credit: Anna McKee
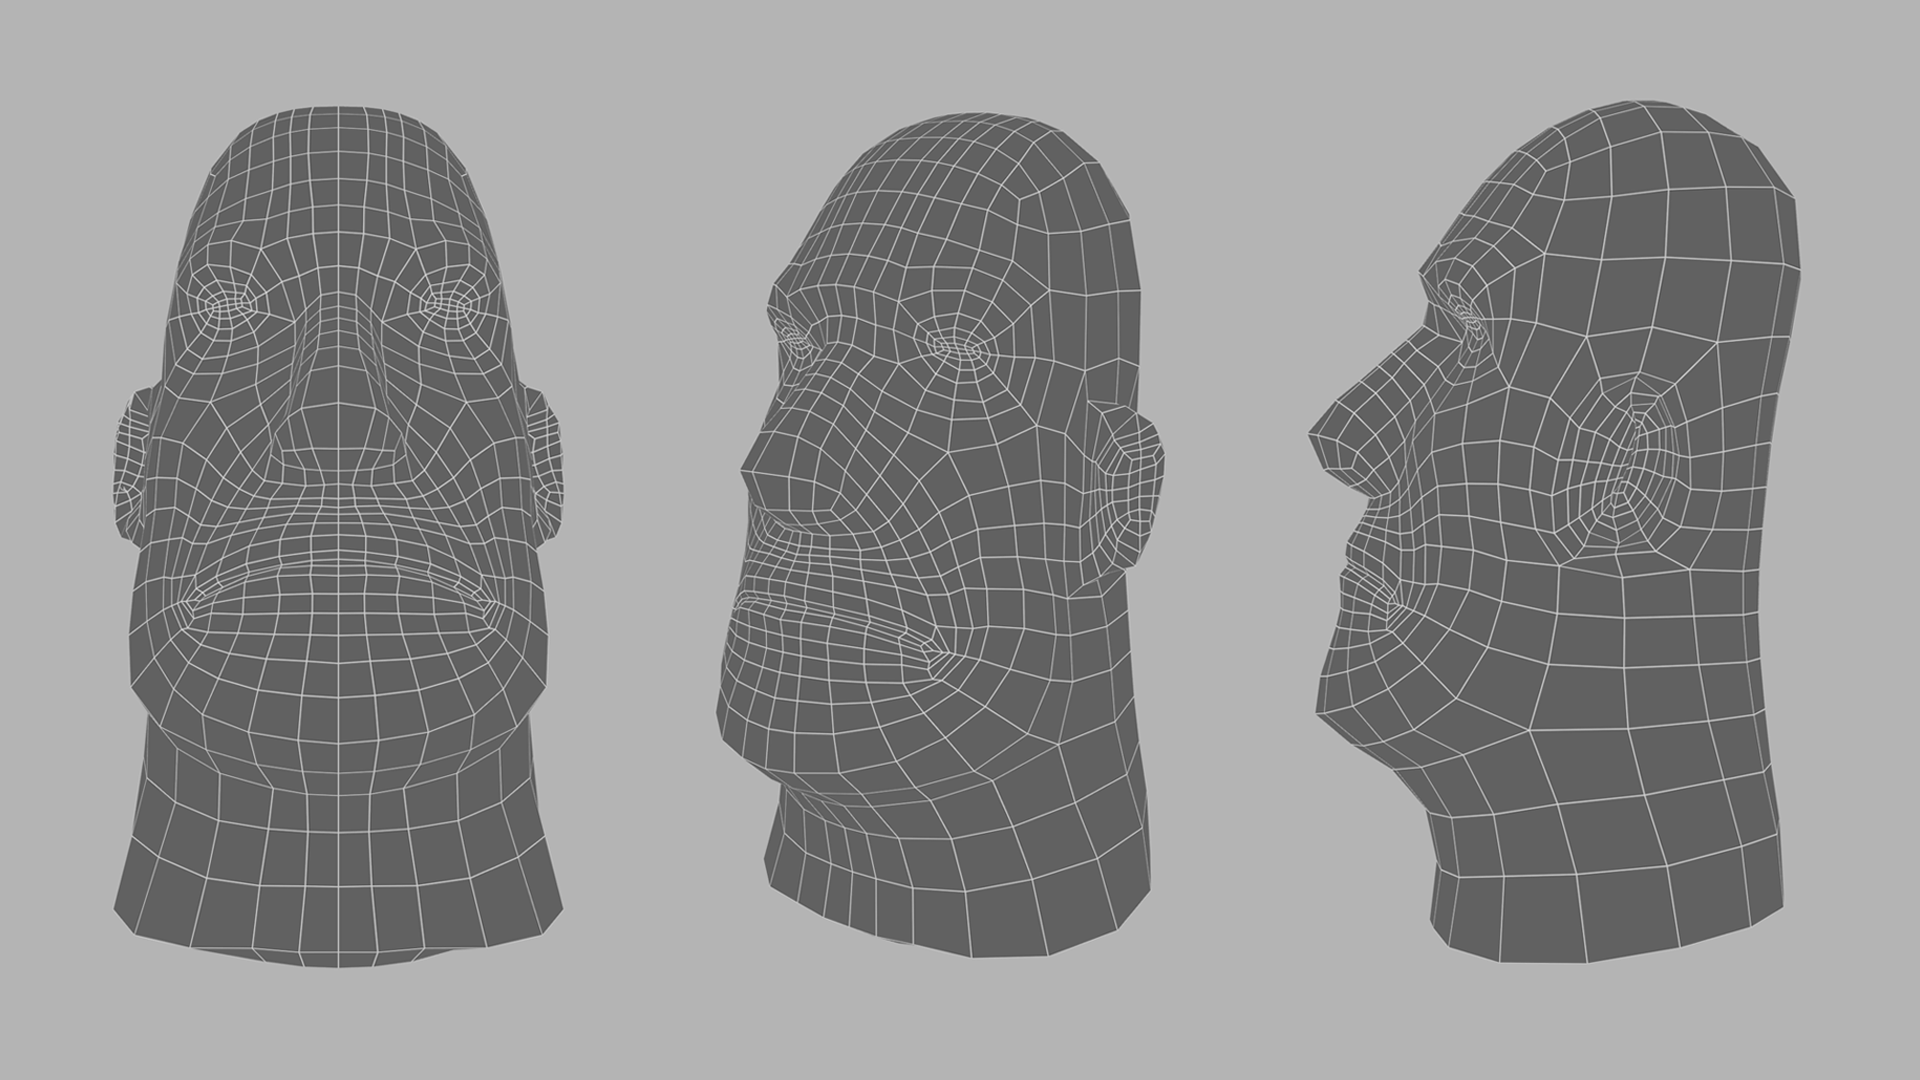
Collecting reference - Retopology
Human face-
Week 6

Internal Workshop -QuaDraw
easter island model-
Week 6
Tutorial: Completed
Rendered: Arnold
Software used: Maya
Personal Difficulty Level: 8/10
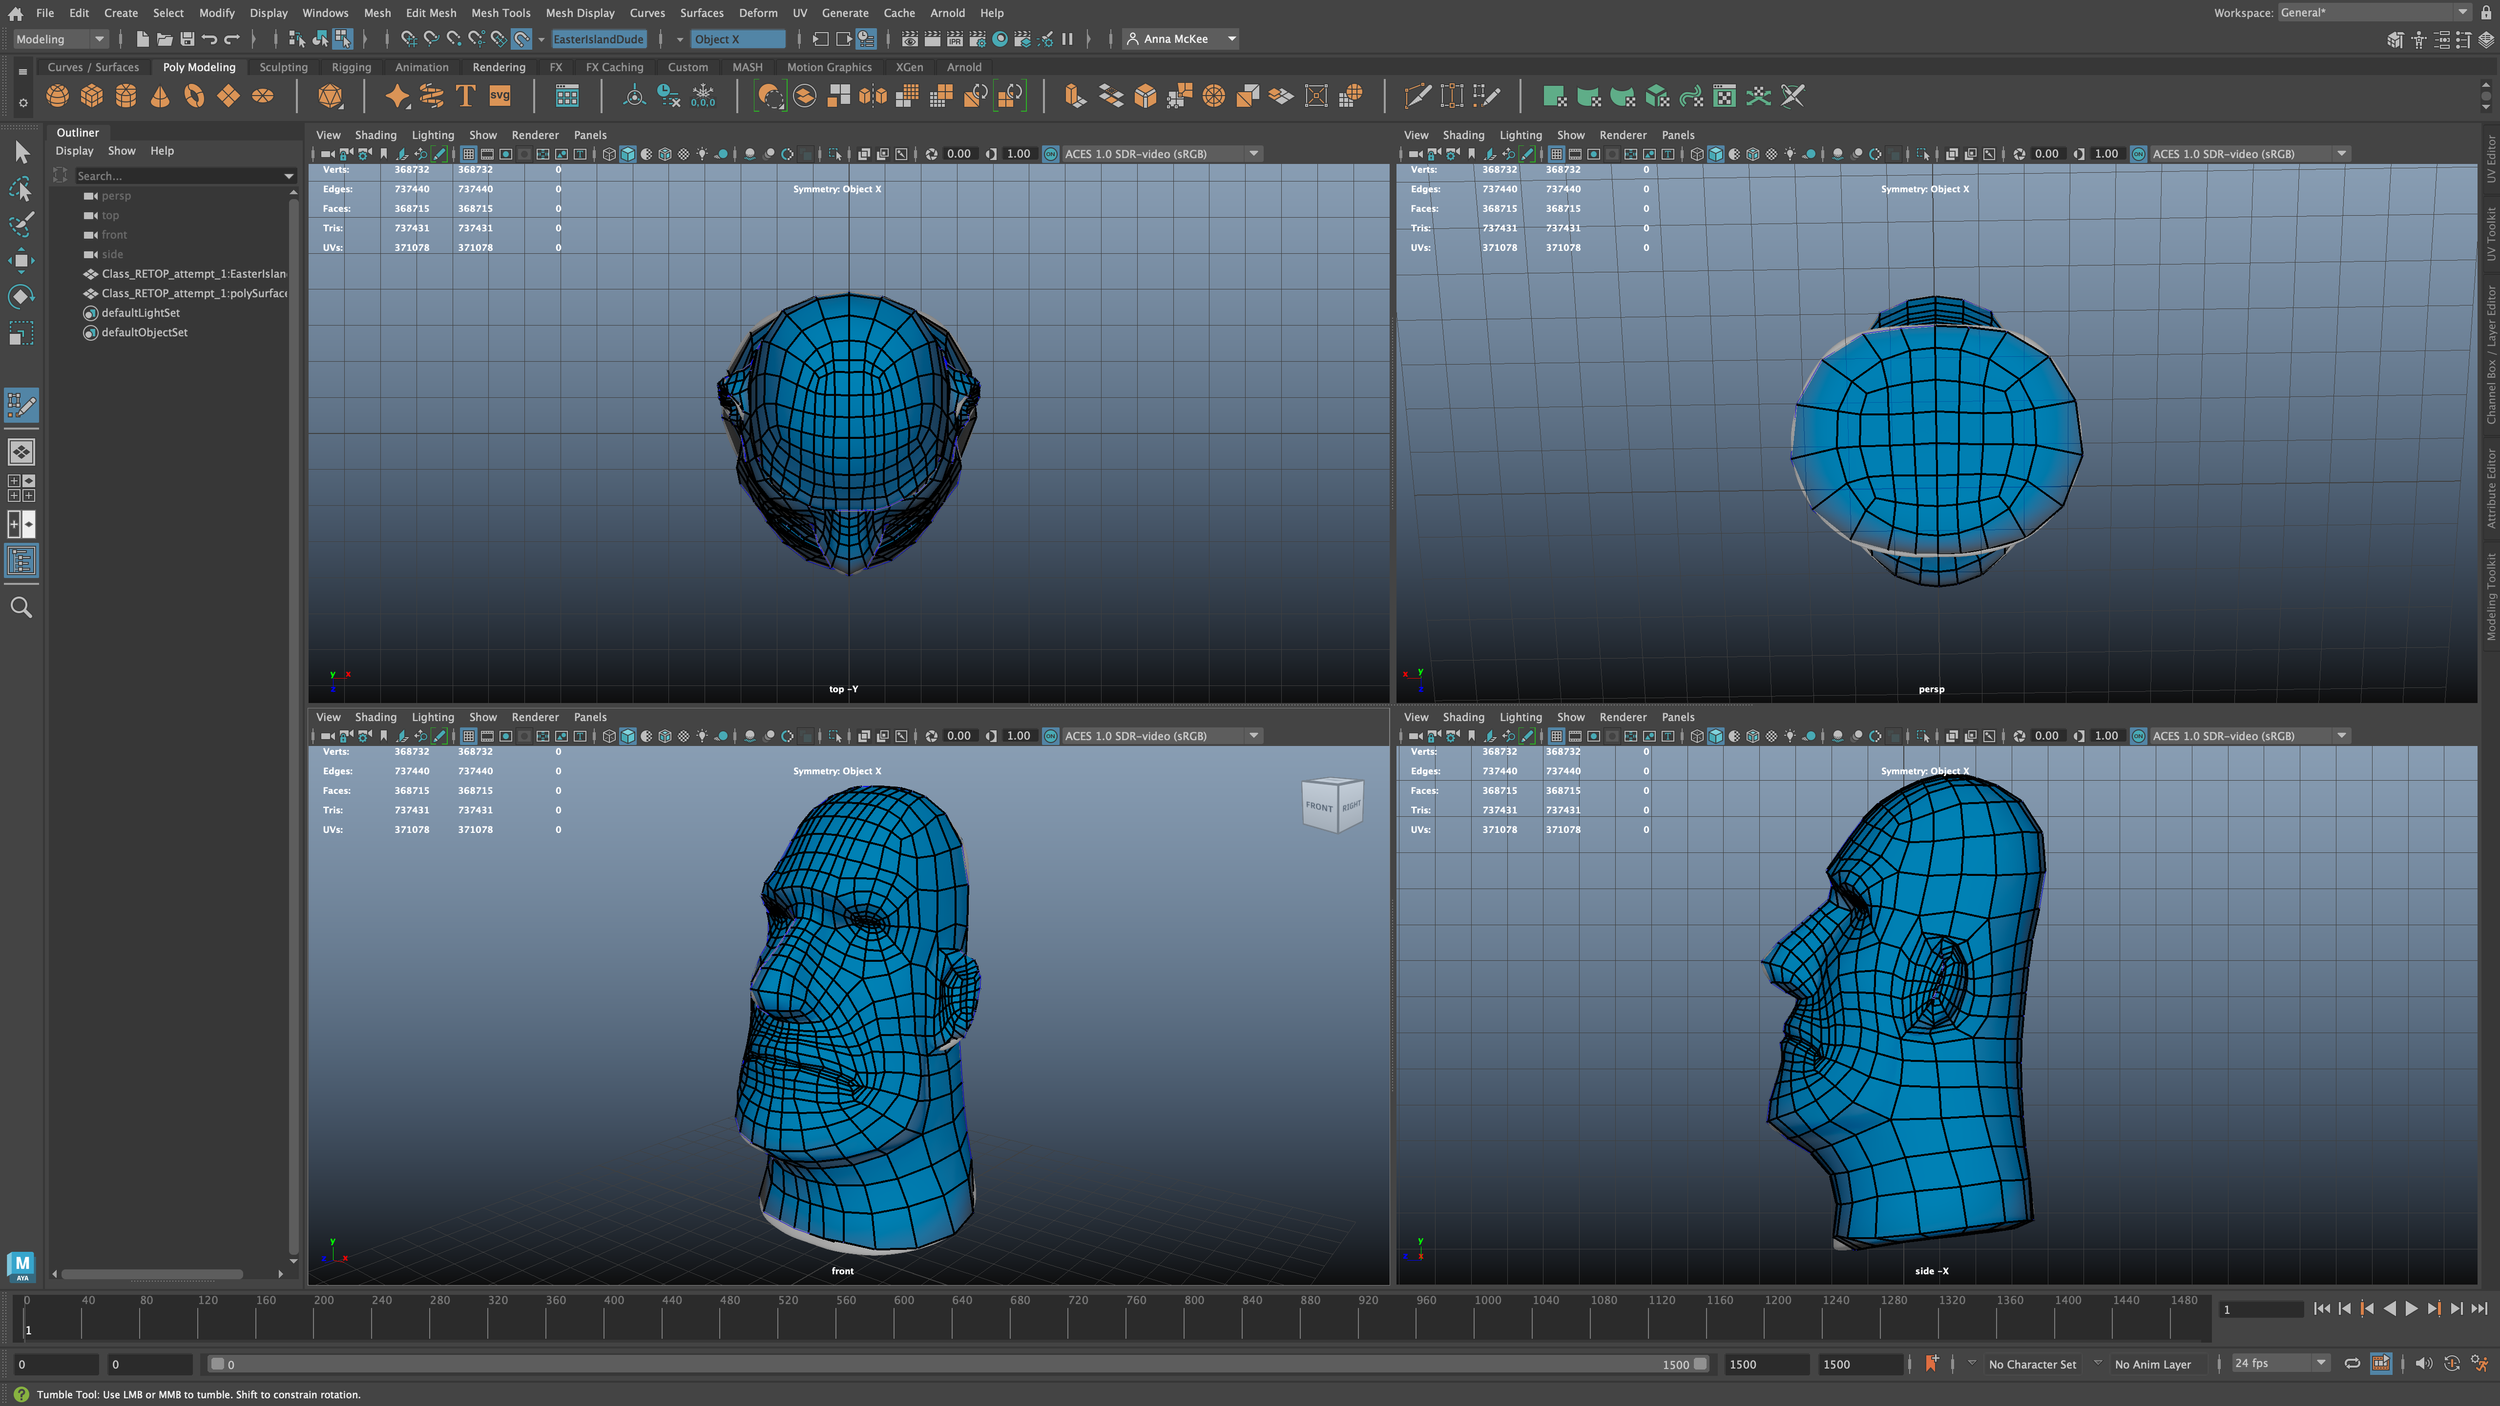
During the beginning of week 6 we were assigned as a class to complete this “Easter island Model”internal tutorial, which utilises the Quad Draw tool while exploring the process of retopologizing.
The goal of this tutorial was to retopologize a high density “Easter Island” Sculpture.
In my opinion this was a perfect example to use when beginning to learn the facial topology layout of a 3D model, as the “Easter Island Model” contains all of the necessary features that any human face would have (although exaggerated). This means that if one were to lean the basic topology edge-loops for this model, it would be applicable within many human faces.
Learning resources
Books: During this entire retopology process I continuously studied/referred to my Summer Reading list of books, specifically both volumes of the "Topology Workbook Vol.1 + Vol.2" - by William Vaughan.
For me, this book was an invaluable source of visual information regarding efficient retopology processes for many organic / hard-surface models.
Websites: How to: Facial Retopology for Animation v2 - Sketchfab - Credit “Edward Jaworenko”.
This website linked directly above, is another learning resource example that I used when completing this internal retopology tutorial.
Personally I found that this website was extremely helpful when referencing a good topology workflow for a human face, as I was able to rotate the 3D facial model around within the “Sketchfab” website. This allowed me to easily view the artist’s topology workflow at every angle.
Retopology Basics & Quad Draw
- Make object live
- Modeling Toolkit - Quad draw - This allows us to place Quads on top of the live surface
- Add points - Left mouse button
- Make Quad from Points - Shift, Left mouse button
- Extrude Edge - TAB, Left mouse button
- Extrude Loop - TAB, Middle mouse button
- Insert Loop - Ctrl, Left mouse button
- Delete Polys - Ctrl, Shift, Left mouse button
- Relax - Shift, Left mouse button
General retopo a basic head
- Place big loops first
- Work from general to specific
- Once you have a low res, you can smooth it (Shift, Right mouse button in Object Mode -
Smooth)


“During this process I came across many challenges, such as Retopologizing the Ear. ”
My process
Creating a loop of Quads around the eyes, joining them together almost like a pair of googles. (X Symmetry has been activated)
Loop was added around the mouth, nose and then a centerline down the middle of the face.
Added a Loop around the ear and neck, whilst extruding the loops around the eyes.
This is the stage were I attempted to ‘fill-in’ the gaps around the rest of the face, although I came across many problems with creating too many Poles/Stars.
(I then began deleting faces and starting again. After many attempts this issue was resolved, as I figured out that I just needed to reroute the edge-flow, specifically within the gaps between the mouth and nose).
Began filling-in (retoplosing) the ear.
This was the most difficult part of the entire process, as I experienced a large quality of ‘clipping’ within the new topology. The issue with the ear was rectified at a later stage.
Model was rotated upside down, added a loop on the underside of the mesh. This loop was then extruded inwards and joined using the Quad-Draw tool.
Relax tool was continuously used throughout the retopologizing process. This reduces the risk of the mesh ‘Pinching’ and makes the topology look cleaner / adheres to the original mesh surface more efficiently.
Noticed symmetry was incorrect, therefore decided to delete half of the model and mirrored the remaining mesh. (This then allowed for symmetrical topology).
Added multiple edge-Loops within the ear using the “Insert-Loop” tool. The final renders were then completed.
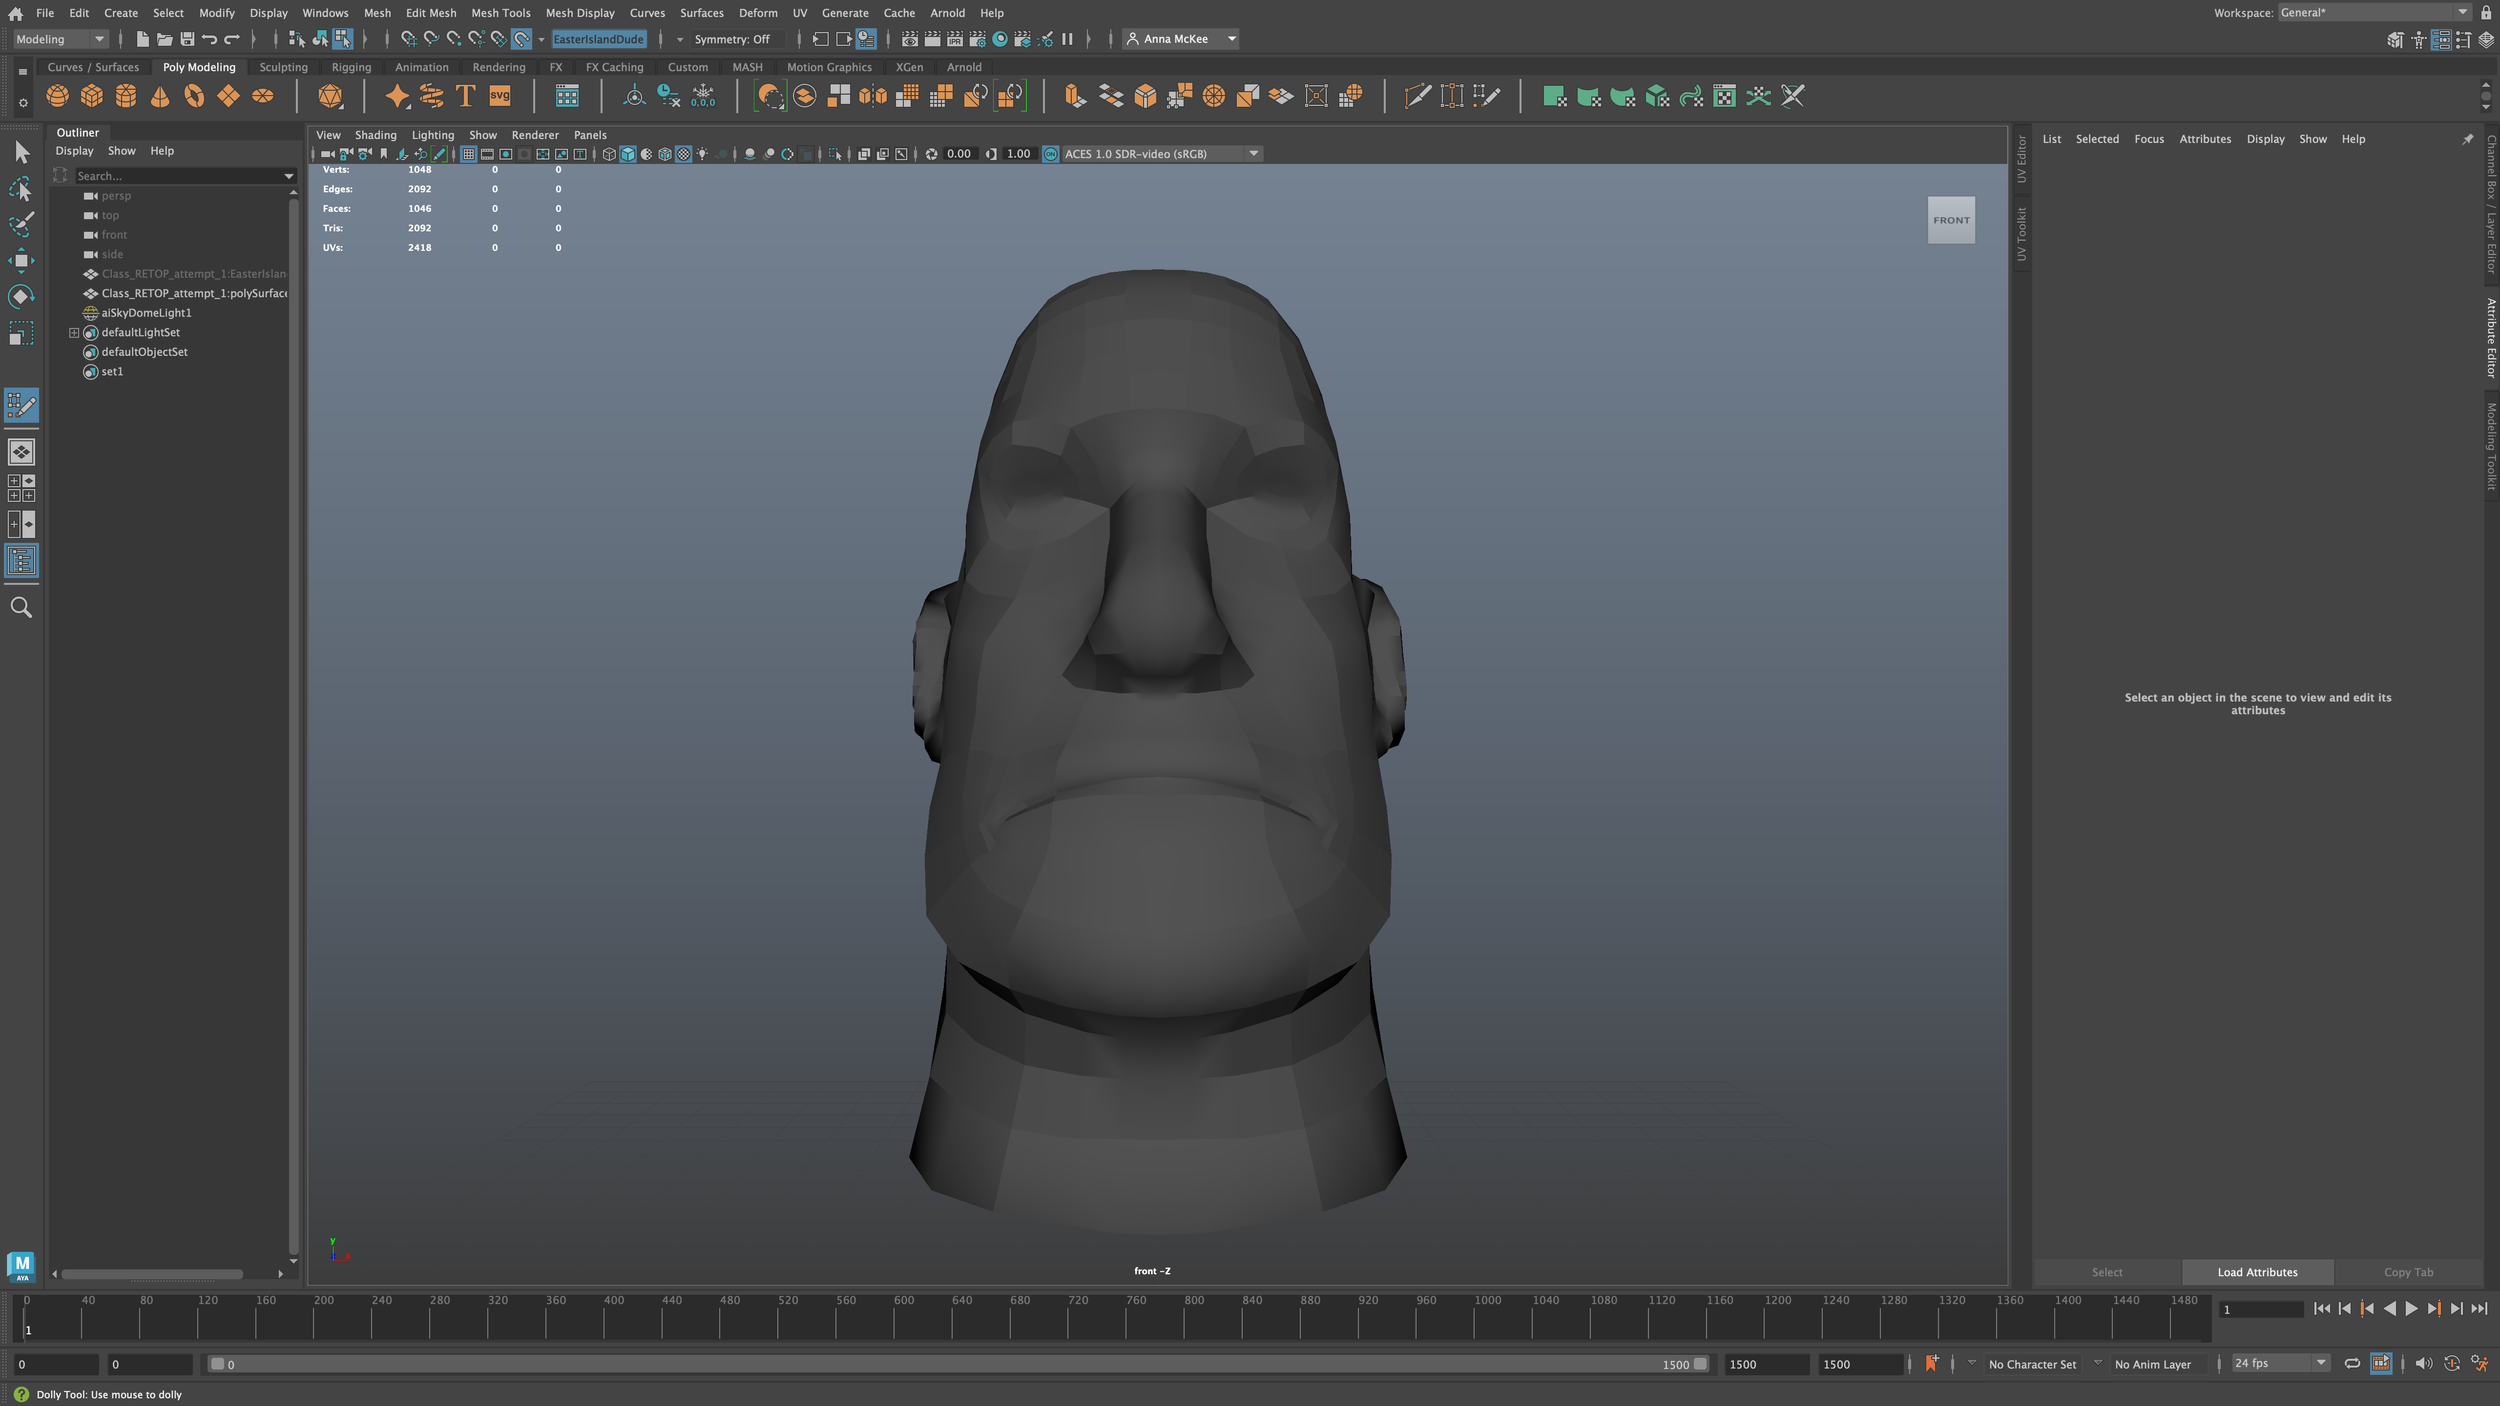
Experimental - Activated “Smooth”, Shift, Right mouse button in Object Mode - Smooth).
(Allowed me to view my topology as a Smoothed mesh. This is when I realised that my topology was too dense within and around the ear.)
Checking Edge-Flow - Video
“Using the ‘Insert Loop’ tool allowed me to check if my loops / edge-flow were correctly following my references.”
Experimental Renders / Smooth Preview


Credit: Anna McKee
Self-Critique:
If I were to recreate this tutorial, I would consider further research and study related to the retopology of the ears, (especially human ears).
This is becuase I have resliased that I have added too many Edge-Loops within the ears of this model, therefore meaning that the mesh density is too high within the ears compared to the rest of the topology.
I feel that it is important to ‘get the balance right’ when creating a low res mesh, whilst also preserving important details and folds within the mesh such as the lips, eyes, ears and noes.
Conclusion:
Personally I did find this tutorial quite complex, as retopology is still quite a new subject to me, although I do feel that it is a process that once you have learned and revised enough, similar retopology methods may be reused again and again within different models (if similar enough, such as human faces / animal faces, considering Edge-Loops and Poles).
In conclusion, I am proud of myself that I was able to complete this tutorial and although it definitely took me much longer than my class -mates to complete it, I feel that I have learned about many topics, (as I learned through the struggle, researched and applied further reading to expand my knowledge within retopology).
External Research
retopology notes / tutorial - Blender -
Week 6


Credit - Anna McKee
I created these notes shown above during my external research regarding retopology within Blender.
I also decided to push this external research further by participating within a “How to Retologise in Blender” tutorial, created by Flipped Normals (screenshots from this external tutorial are shown directly below).
External tutorial - “Retopology in Blender”-
Week 6


Credit: Screenshots provided by Anna McKee
Credit: External Tutorial followed: “Retopology in Blender” - Flipped Normals
Self-critique:
Overall I feel that I would have liked to complete this tutorial to its fullest extent, as there are processes that I did not have time to complete (although I feel that they are very useful and important to learn).
If I were to go back and reattempt this tutorial, I would like to set myself the challenge of completing it without the use of the video, then study my final result and compare it with the topology from the tutorial, discovering where I could improve.
Conclusion:
Personally I feel that by following this external Retopology tutorial has helped me to grasp a basic understanding of the principles, rules and tips regarding the optimization of Facial Retopology within Blender, (although I feel that this area of thinking can also be applied to any 3D programme, such as Maya).
individual self-study - Retopology
Further Reading
"Topology Workbook Vol.1+ Vol.2" - William Vaughan
Week 6


Credit: "Topology Workbook Vol.1" - William Vaughan, "Topology Workbook Vol.2" - William Vaughan
Conclusion:
Once we started covering the topic Topology during class time (Week 6), it soon occurred to me that I had two specific Topology guide books within my possession.
These books were part of my university assigned “Summer Reading List”, although when I had previously read both of these books during the summer months of 2022, I found them both extremely difficult to understand, therefore I felt that they were slightly too complex for my understanding. This made me realise that I would need to complete further research regarding many areas surrounding Topology, such as Edge rerouting from high-density to low-density and the importance of Edge-Loop placement within the face.
During week 6 of the course I then rediscovered both of these amazing books! - (Titles and links of books are shown directly below)
When reading over these books for a second time, I realised that I had gained further understanding regarding the previous topics that I had lacked awareness within, (this was due to the completion of further study and internal / external tutorials completed regarding the 3D pipeline).
In conclusion I feel that both of these books are extremely important and useful when I am retopologizing my own 3D models, as I have already used them as a reference guide when Retopologizing my previous “Easter Island Model”, Internal university tutorial.

WEDNESDAY SUPPORT SESSION
- UV Unwrapping
Week 6 -
Online - 10:00-12:00, 16th November 2022
Topics covered within the support session:
Using Seams - Their importance, function
UV Unwrapping a pair of headphones
Unfold Tool - Quick, but this might create some level of distortion within the UV Island
Discussion regarding unseen places that don’t need UVs
Manually straightening UVs using the “Scale Tool” - Extra steps that are useful when creating accurate UVs
Sew Tool
Less Seams used = More UV Distortion, this method is quicker
More Seams used = Less UV Distortion, this might create too many UV Islands
Learning to combine the use of the Unfold tool, creating seams, scaling / straighten UVs and then sewing back together the UVs. This will help to create less stretched UVs / Uv Islands, although this process might be slightly more complex and take more time
16/11/2022 -
Conclusion:
Overall I found this Wednesday support session to be extremely helpful and necessary, as recently I had been struggling with some of the aspects around UV Unwrapping within Maya, therefore participating within this support session really helped me to gain a larger understanding of the topic.
I am aware that I still need to complete my own further external research regarding this area of Uv Unwrapping, especially before I attempt to UV unwrap my own final character models.
Introduction to Maya and Arnold Shaders -
Week 7
Topics Covered -
21/11/2022
During our class on Monday we were introduced to the complex topic of “Maya and Arnold Shaders”, which included areas such as:
Maya Shaders Vs Arnold Shaders (aiStandard Surface Shaders) - How they are important when wanting to create realistic / stunning materials
Hypershade - Its function / relevance when creating materials, shading networks, connecting rendering nodes and many other processes
PBR - “Physically Based Rendering” - The science behind it - Specular, Subsurface Scattering, Refraction, Microfacet Theory, etc
Different types of maps used in PBR - Albedo, Normal, Roughness, Metalness, Specular, Height, Opacity, Ambient occlusion, Refraction and Self-illumination
sRGB - “Standard Red Green Blue” - Gamma Correction - How your computer monitor may affect the how you perceive a final render
Image credit: Truca Team
Further insight into topics -

Render credit: Anna McKee
What are Shaders in Maya:
Shaders within Maya are applied to a model to add colours and texture, the process for this is called “Shading”.
The shader defines an object's look, colour, texture, transparency, luminescence, glow, etc.
Basic maya materials will allow you to create substantial colours/materials, although they are limited within the area of realism and effectiveness.
Each time we create a new mesh within Maya it is automatically assigned a Maya shader called “lambert”, which portrays a simple, medium-grey colour.
lambert - This deult Maya shader has no specular highlights, meaning that although light will hit it, no light will bounce off the object -
Material will be added by default to any new mesh
blinn - The blinn shader creates a small amount of specular light -
Good for metals and plastics
phong - The phong shader has more specular highlights, although this means that it will take longer to render -
Extremely glossy, used for glass-like / glossy surfaces

Arnold Shaders/materials:
Arnold Shaders (or commonly presented as the suffix “ai” in front of a word), help us to create extremely realistic (realworld) materials, although they can be used for a cartoon/stylised effect as well. The reason why Arnold Shaders are so special is because they take into account ‘real-world- physics’, which is why the materials created through them are substantially more realistic when compared to Maya’s default shader list.
These shaders are much more powerful than Maya’s default shaders and will help us to adjust elements such as Transmission, Reflection / refraction, Absorption, scattering, etc.
Having so much creative control will allow us to create almost any material imaginable, this is what makes Arnold Shaders industry standard.
Screenshot Credit: Anna McKee


Screenshot Credit: Anna McKee
The Hypershade: -
The image of the Hypershade is shown directly above.
The Hypershade within Maya allows us to build shading networks by creating, editing, and connecting nodes such as: textures, materials, lights, special effects, etc.
It is a powerful tool/interface that helps us visualise what shaders we are using, inclduing maps/textures. This is an important tool to use especially when ‘plugging-in’ texture maps from Substance Painter.
PBR:
PBR is an abbreviation for Physically Based Rendering. It is a method of shading + rendering that will provide a highetened and accurate representation of how light interacts with materials/ their properties.
Arnold standard material is an example of a PBR material which will allow the user to create extremely physically accurate materials that reflect ‘real-world’ lighting conditions / elements.

What are maps / their use:
Using a specific combination of PBR maps within our workflow will allow us to create added texture, lighting, effects such as rust, cracks, dust, bumps, colours, etc.
The process of creating maps, exporting and connecting them to their correct shader nodes is an essential (industry-standard) method too, especially if you want to create stunning, realistic or bumpy textures on your object or character.

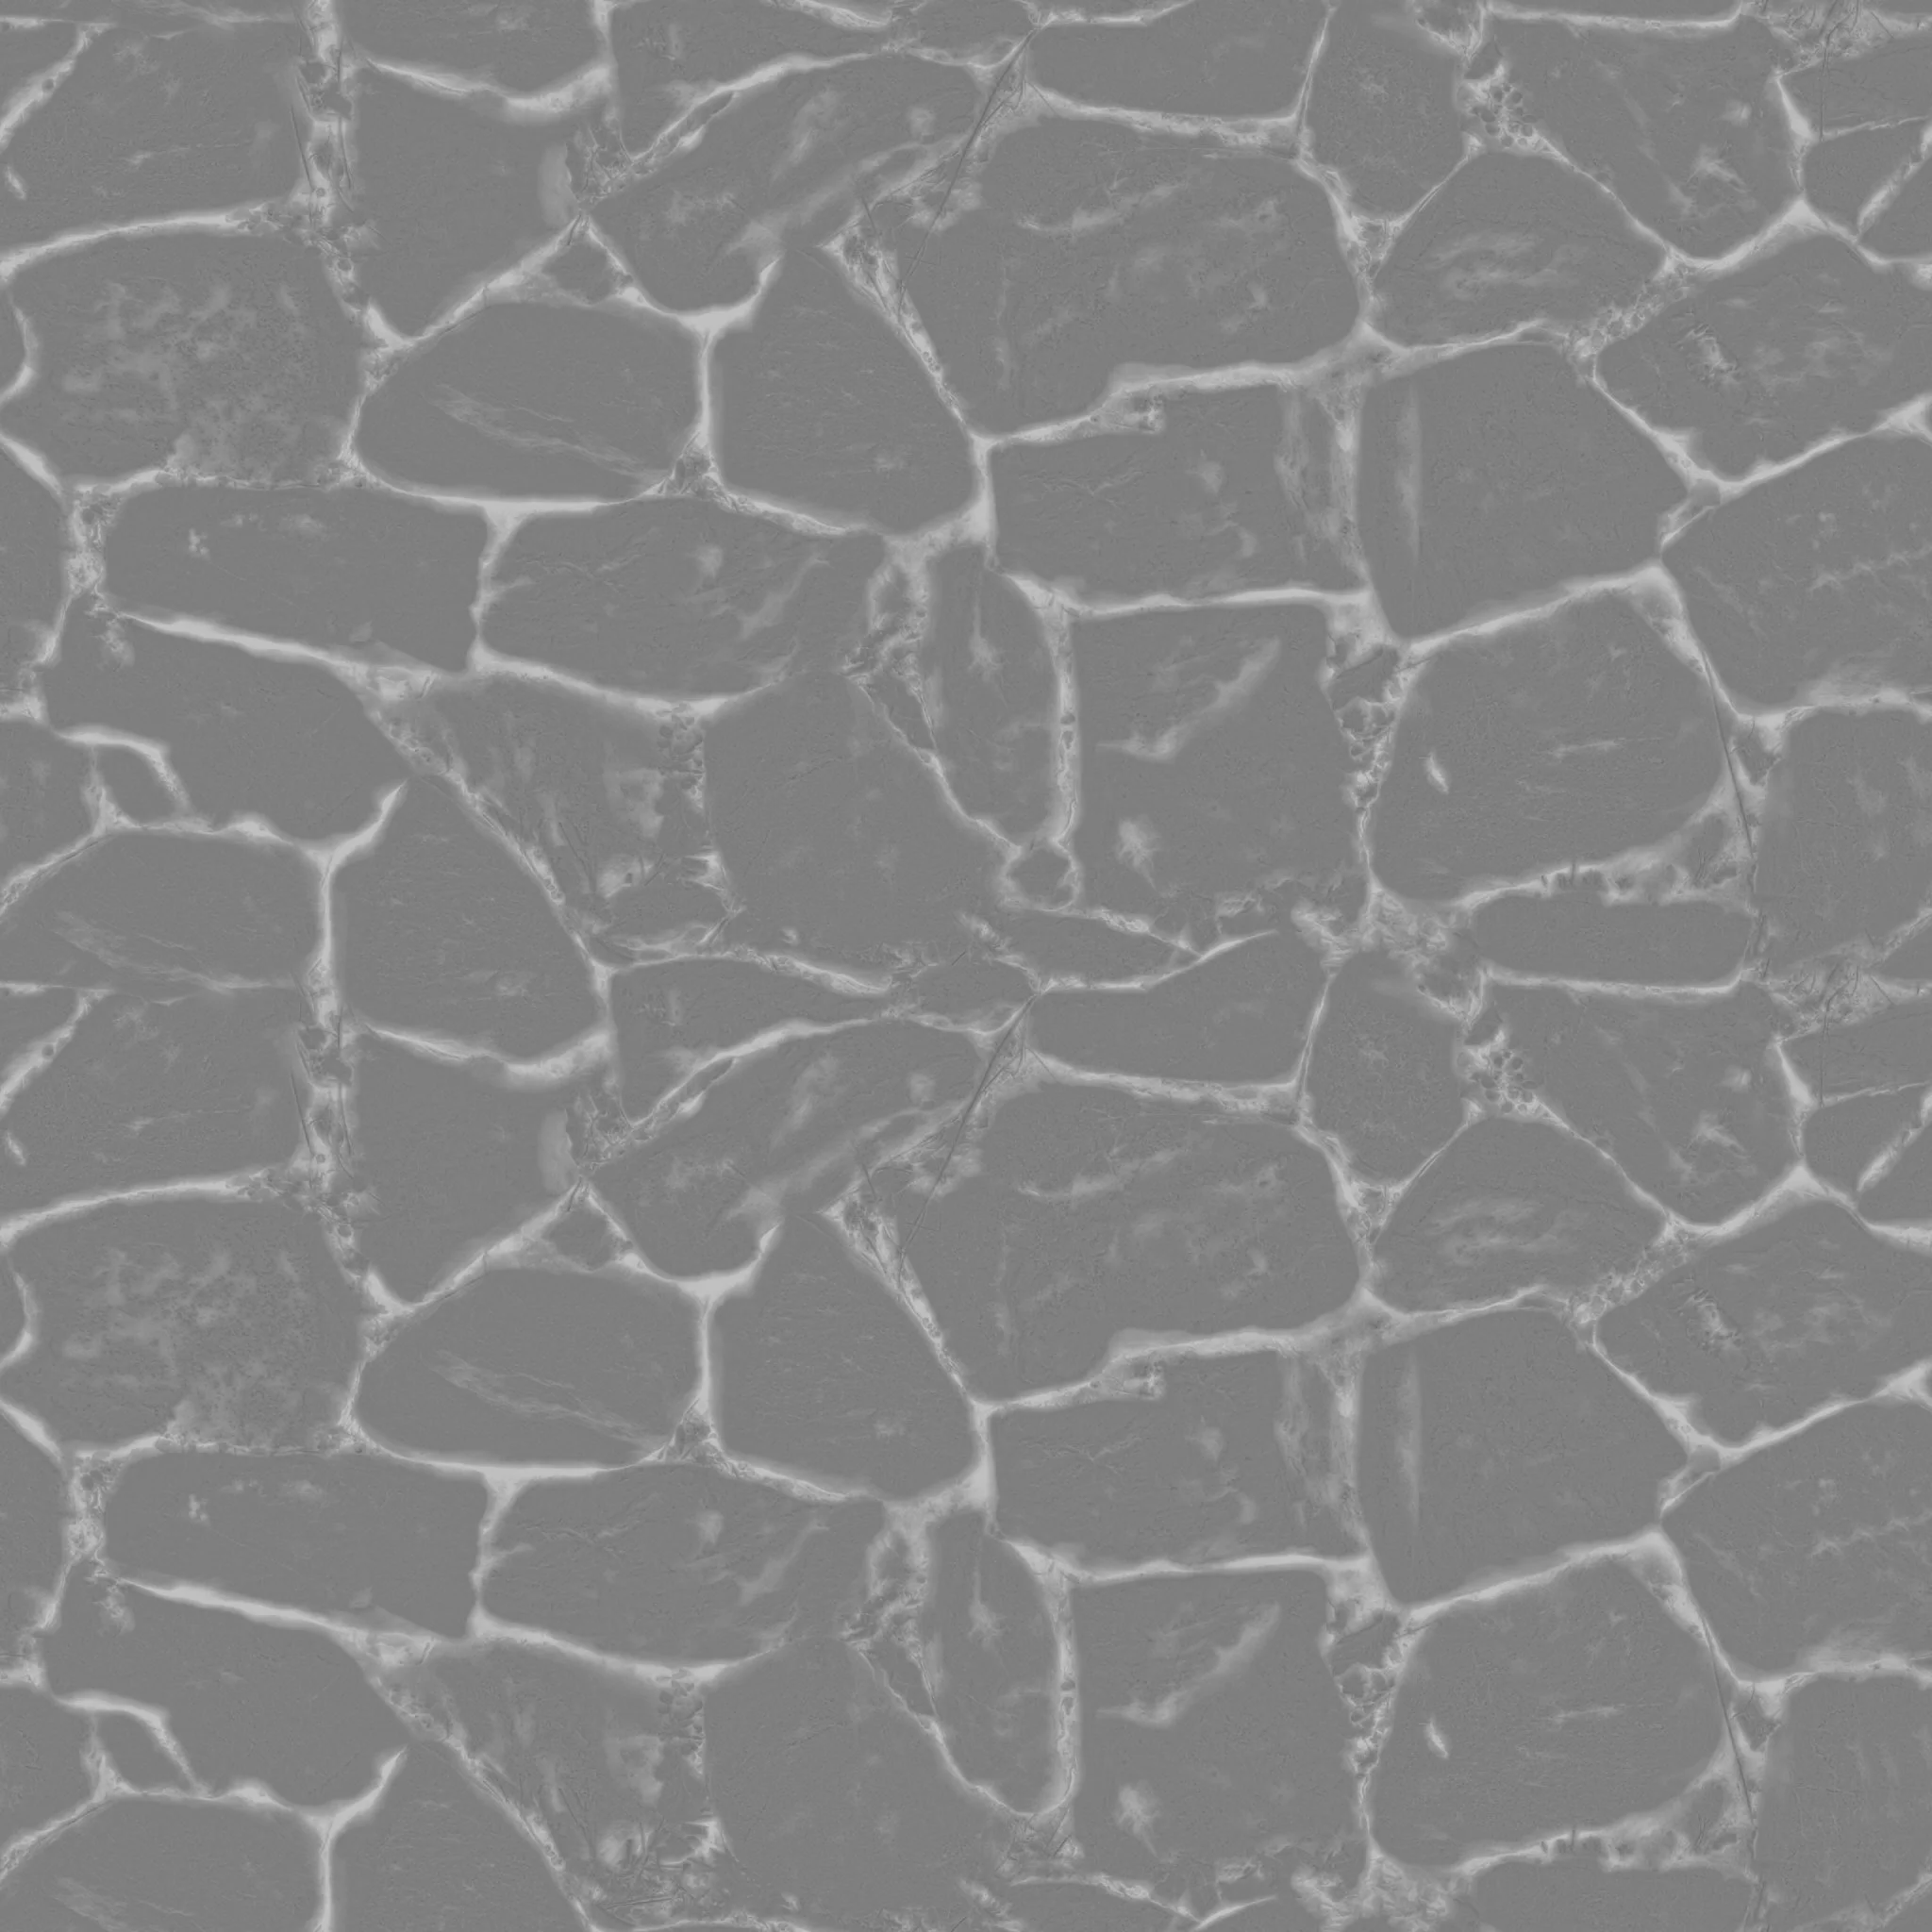


Image credit: ambientCG
The necessary maps needed for PBR are shown directly below:
Albedo Maps - Base colour / pure colour, no shadows are visible within this map - This map defines the diffuse colour or reflectivity of the surface
Roughness Maps - Will determine how rough or smooth a surface is - Also will affect the sharpness / blurriness of reflections and highlights on the surface
Height Maps - This map allows us to create the illusion of height and depth within a texture - White = highest point, black = lowest point - The grey colour is the base texture surface
Normal Maps - Gives the object the illusion of more detail, without the extra polygons - Extremely useful when we want to keep the polycount low, but add more detail
Ambient Occlusion Maps - This is a grayscale map which contains lighting data - It is usually combined with the diffuse map to bake in soft shadows
Helpful websites that allow you to download free Texture Maps:


Image credits: DPSB, Digital Photography School
sRGB:
These related diagrams / charts are shown directly above -
sRGB stands for “Standard Red, Green and Blue”.
sRGB is a colour-space that is commonly used / standardised on computer screen monitors around the globe. It is important that we are aware when using different colour spaces, as the colours that appear on our screen may not reflect evenly across all monitors (especially printers, although currently we are more focused on the aspects of screens as 3D artists/animators).
sRGB was created by Microsoft and HP for digital, computer, smartphone and tablet use. It portrays the most appropriate colour space for computer screens and other digital devices. There sRGB will be the most commonly found colour space within the digital realm.
The reason why this is an important element to consider when 3D modelling is because the colour space (sRGB) will dictate how we see the colours within our own 3D models / textures, (along with any potential employer!)
Therefore having a set standardised colour-space will allow us to view the colours in our 3D models / textures with the same visual perception as anyone else (ie, others viewing our work from their computer monitor, mobile, tablet).
Class Notes - Maya and Arnold Shaders -
Week 7


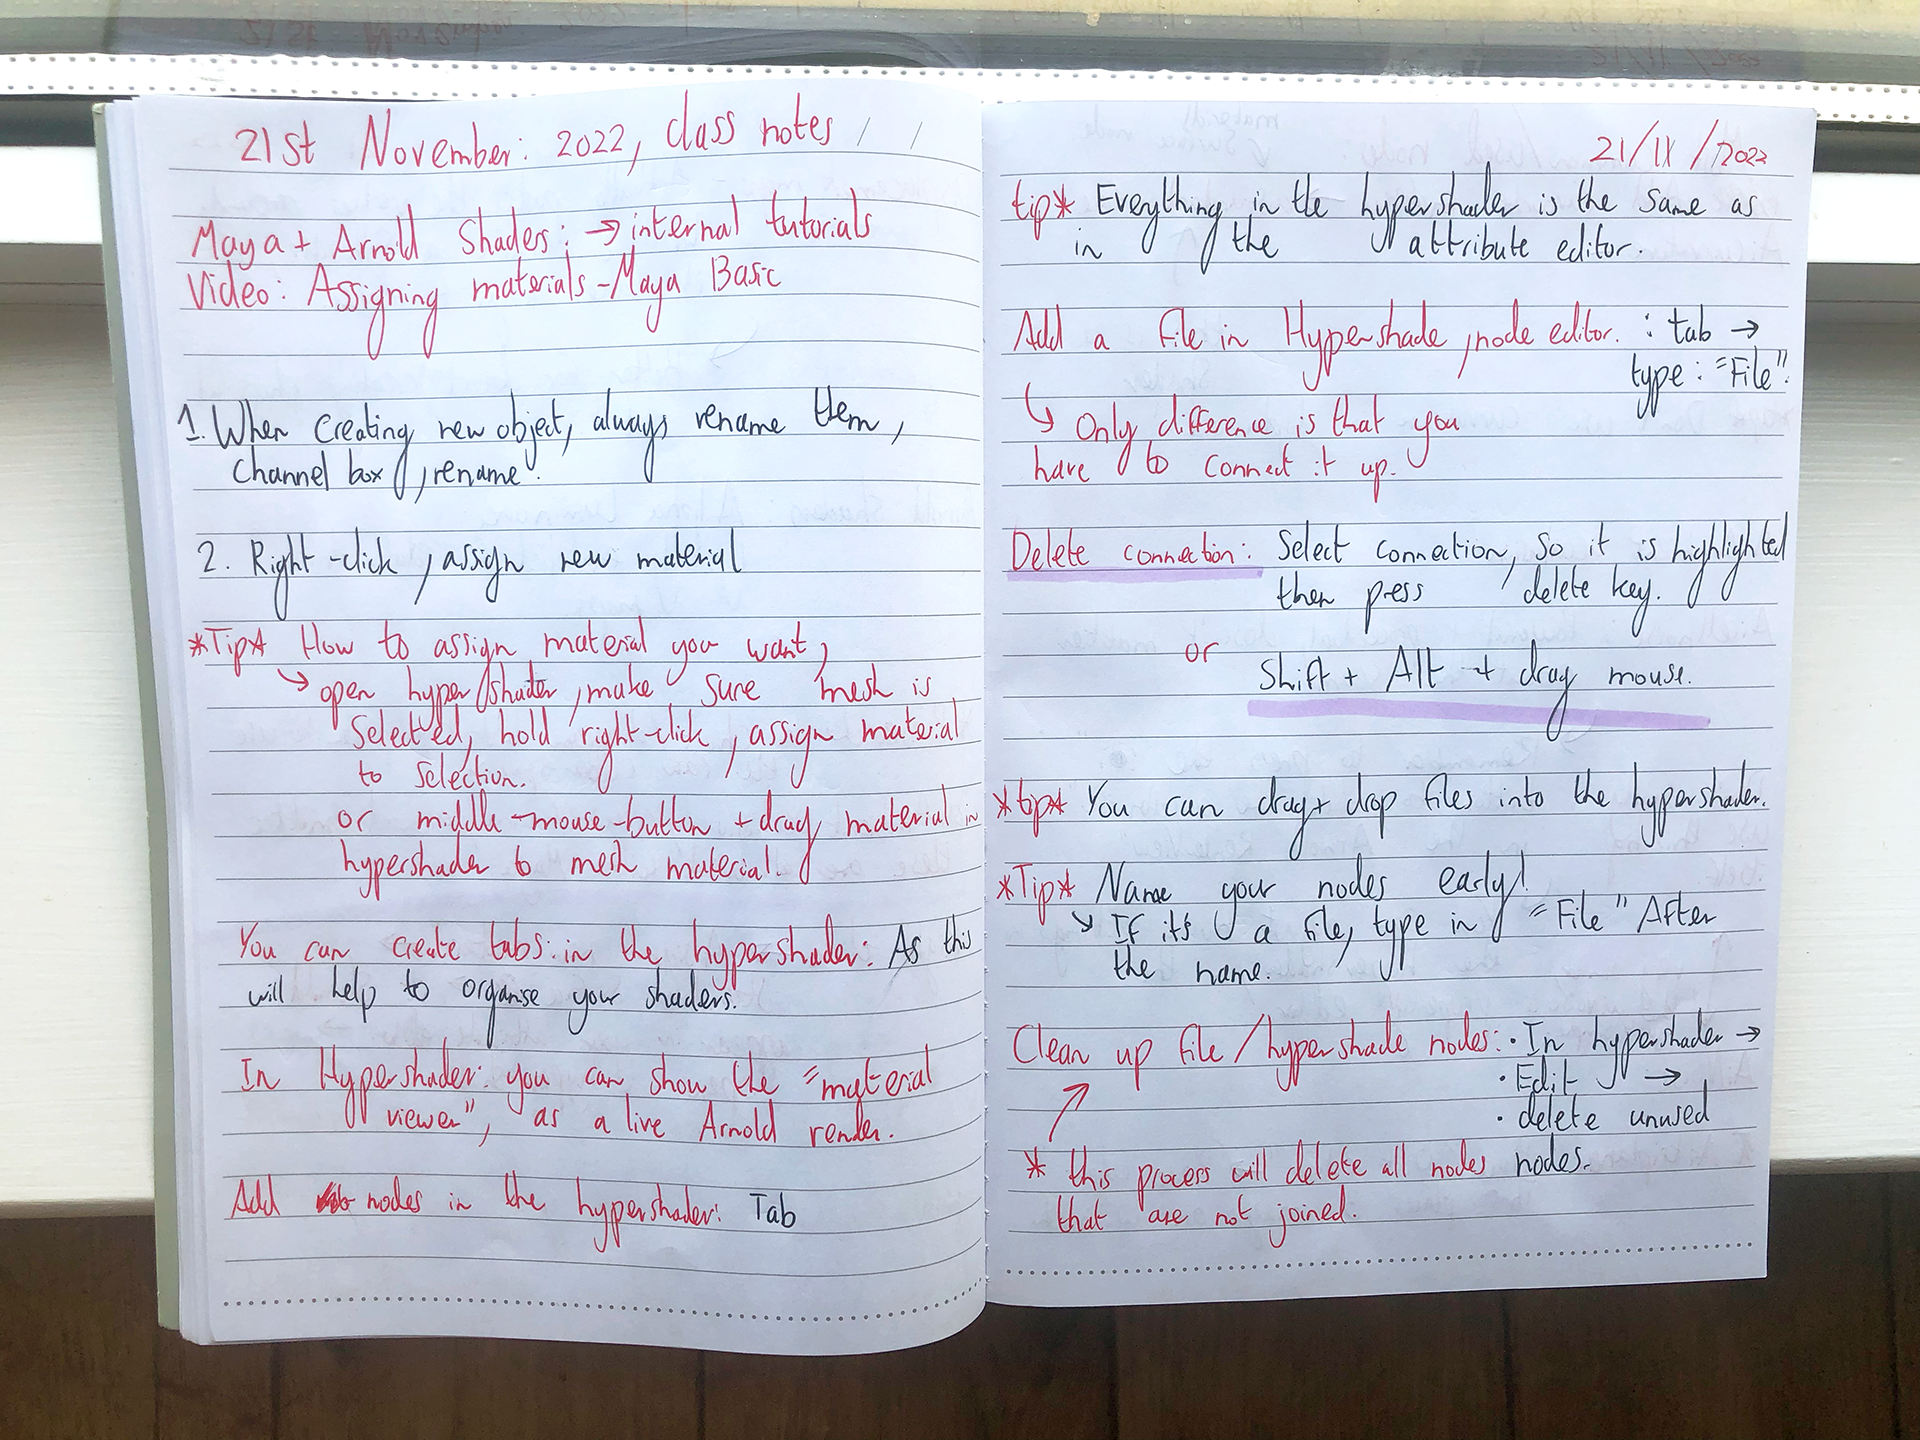
Credit: Anna McKee
21/11/2022 -
Self-critique / Conclusion:
Overall I did struggle with the pace and complexity of Mondays class (21/11/2022), as I felt that the topic of “Maya and Arnold Shaders” covered such a large area within Maya that I was unfamiliar with.
I believe that the best way for me to tackle this issue of falling-behind / struggling with the topic is to complete my own further internal and external tutorials (including extended reading) regarding this difficult topic.
My goal for the future is to be able to completely understand this subject and apply everything that I have learned to my own 3D models, as this will be a necessary process during the 3D Production Pipeline.
One a more positive note, I am pleased that I recorded these notes shown above during class time. This is because I am now able to re-evaluate them during my own free time / directed self-study, which allows me to work at my own pace (helping me to absorb the information more efficiently).
External Self-study
Further Reading - Week 7

THE PBR GUIDE - PART 1
Light Rays
Absorption and Scattering - Transparency and Translucency
Diffuse and Specular Reflection - Microfacet Theory
Color
BRDF
Energy Conservation
Fresnel Effect - F0 (Fresnel Reflectance at 0 Degrees)
Conductors and Insulators - Metals and Non Metal
Linear Space Rendering
Key characteristics of PBR

THE PBR GUIDE - PART 2
What is PBR? What Are The Benefits? What Does It Mean for the Artist?
Metal/Roughness Workflow Dielectric F0 / Base Color / Metallic / Roughness / Resolution and Texel Density
Pros and ConsSpecular/Glossiness Workflow Diffuse / Specular / Glossiness / Resolution and Texel Density Pros and Cons
Maps Common To Both Workflows Ambient Occlusion / Height/Norma
Substance PBR Utilities Substance Designer / Substance Painter / Substance Outputs and Rendering
Charts Is the Surface Metal? / Reflectance Values /Correct/ Incorrect Comparisons
Conclusion:
Both of these PDF digital books were very useful when collecting information regarding the scientific / 3D basics of PBR Shaders in Maya.
Internal Workshop - Maya and Arnold Shaders
Floor Tile - Experimental Phase / Unfinished
Week 7

Rendered: Arnold
Software used: Maya, Arnold
Personal Difficulty Level: 9/10
21/11/2022 -
This “Floor Tile” Internal Workshop represents our very first task we were given during class time, beginning week 7 (Maya and Arnold Shaders).
Although my goal was to complete this tutorial, I felt that once I progressed about a quarter of the way through it, that I began falling behind with the class instructions (as this was a live class task).
This task remains incomplete for now, but I felt that it was important to study / re-evaluate the processes that I found difficult and how I might in the future begin to understand these complex topics and apply them professionally to my workflow. (This will be important for the later stages of creating my final 2 characters).
Topics covered within this live class workshop:
Albedo Maps
Roughness Maps
Height Maps
Normal Maps -
Hypershade
Arnold Render View
Creating / moving a Directional Light
Correctly joining nodes in the Hypershade to present the Maps in the render / viewport


Screenshots: Internal Workshop - “Floor Tile”


Screenshot Credit: Anna McKee
Experimental Renders
Week 7 -


Experimental Render Credit: Anna McKee
Self-Critique:
If I were to reattempt this internal workshop again, I feel that I would like to complete it to its fullest extent and present it as a professional final Arnold render.
I feel that if I had previously gained a more in-depth understanding of Shaders within Maya, I would have been able to ‘power-through’ this workshop and complete it on time.
Conclusion:
In conclusion, I am disappointed with myself for not being able to complete this workshop, as I would have liked to view / present the final render of the “Floor Tile” on my blog. I also feel that if I were to complete it, that I would have pushed myself to learn many new aspects of the Shading process in Maya.
One of the most important areas that I personally struggle with is my understanding of the process when linking Maps (Normal maps, Albedo Maps, Roughness Maps, Height Maps) into their prescribed shader within the Hypershade.
This is an area that I want to be able to understand to its fullest extent as soon as possible, due to it being a necessary process to cover within my final character model project.
External tutorials -
“Introduction to Maya:”
Further self-study: Week 7

Credit: Flipped Normals: “Introduction to Maya”
External episode list: “Maya Shaders” - Esp 50, “Understanding the Shader” - Esp 51,
This FlippedNormals, “Intro to Maya” (ESP 50. 51), was a ‘follow-along’ tutorial, therefore I was provided with the Maya files shown below (this included all the meshes, lighting, camera set-up).
Each Maya file had a corresponding tutorial video (also supplied by FlippedNormals). This video file explained the process of utilizing different Maya shaders, the Hypershade and the ‘how/why/when’ behind the process of creating material effects such as Emission, colour, Subsurface Scattering, etc.
The purpose of this external tutorial was to use the Maya files the audience is provided with and explore the shader settings / Hypershade using the ‘follow along’ video tutorials (which are also provided).
For example, I would open the Maya file and corresponding video file, follow-along with the video file, while adjusting the material / shader settings, therefore creating a final Arnold render (whilst also learning the how/why behind each step).
Following this process allowed me to take notes, experiment and learn throughout the completion of this external tutorial.
Reason / explanation for completing this tutorial:
I felt that it was important for me to complete this further study (External FlippedNormals tutorial) into Maya Shaders as I had previously not been able to keep up with the pace of Mondays’ class ( 21st November 2022 ). Therefore there were many topics that I still did not understand related to the Hypershade, nodes, materials and shaders.
I also felt that it was important to gain a thorough understanding of these areas as they would be needed to complete the process of adding colour / material effects to my final 2 character models (final assignment).
My notes: External Tutorial -
“Introduction to Maya:” - Esp 50, 51


Note credit: Anna McKee
General topics covered within tutorial:
How to isolate shaders in Arnold Render View - select small circular button within the “Arnold Render Preview”
Tips - Always label your shaders as soon as possible, this will help organise your workspace and avoid confusion
Shader Group - A blue box within the Hypershade, a group where we assign all the shaders
Assign shader material to viewport - Select mesh (Object mode) > Hold right-click over material node in Hypershade > Assign material to viewport selection
Keep values between 0 and 1 - not usually selected in between
Shaders / settings covered within Tutorial:
aiStandardSurface - A powerful, realistic shader that can create almost any material (whether it be real-world or cartoony)
aiAmbient Occlusion - Shows subtle variations in lighting, detects surface details that would otherwise be washed out or unnoticeable
aiCellNoise - Powerful + prodedual, doesn’t matter about the placement of seams
aiTriplaner - Places 3 images on to mesh
Displacement Shader - Defines the shape of the model
Surface Shader - Shows surface attributes
Roughness - Creates reflectivity, set roughness to zero
Specular - Creates reflectivity, adjusted via “Roughness” - Shiny / dull
Transmission - Creates transparency through Refractions - How transparent the object is
IOR - Index of Refraction - Bends light - (More IOR = Object bends more light) - (Less IOR = Object does not bend light / bends less light)
SSS - Subsurface Scattering - Great for organic models - (Value too low = Mesh will look like wood) - (Value too high = Mesh will look like wax)
SSS Tip 1 - Use “Randomwalk” or “Randomwalk_v2”, - These will both provide a higher standard of SSS - (Do not use “Diffusion”)
SSS Tip 2 - There is no Skin Shader in Arnold, everyone uses “aiStandardSurface” > “SSS” > “RandomWalk” - This will help create realism
Emission - Creates a ‘glow’ from the mesh - Perfect for heated metal
Subsurface - Determines if light is scattering in to the object
Base - What is the colour
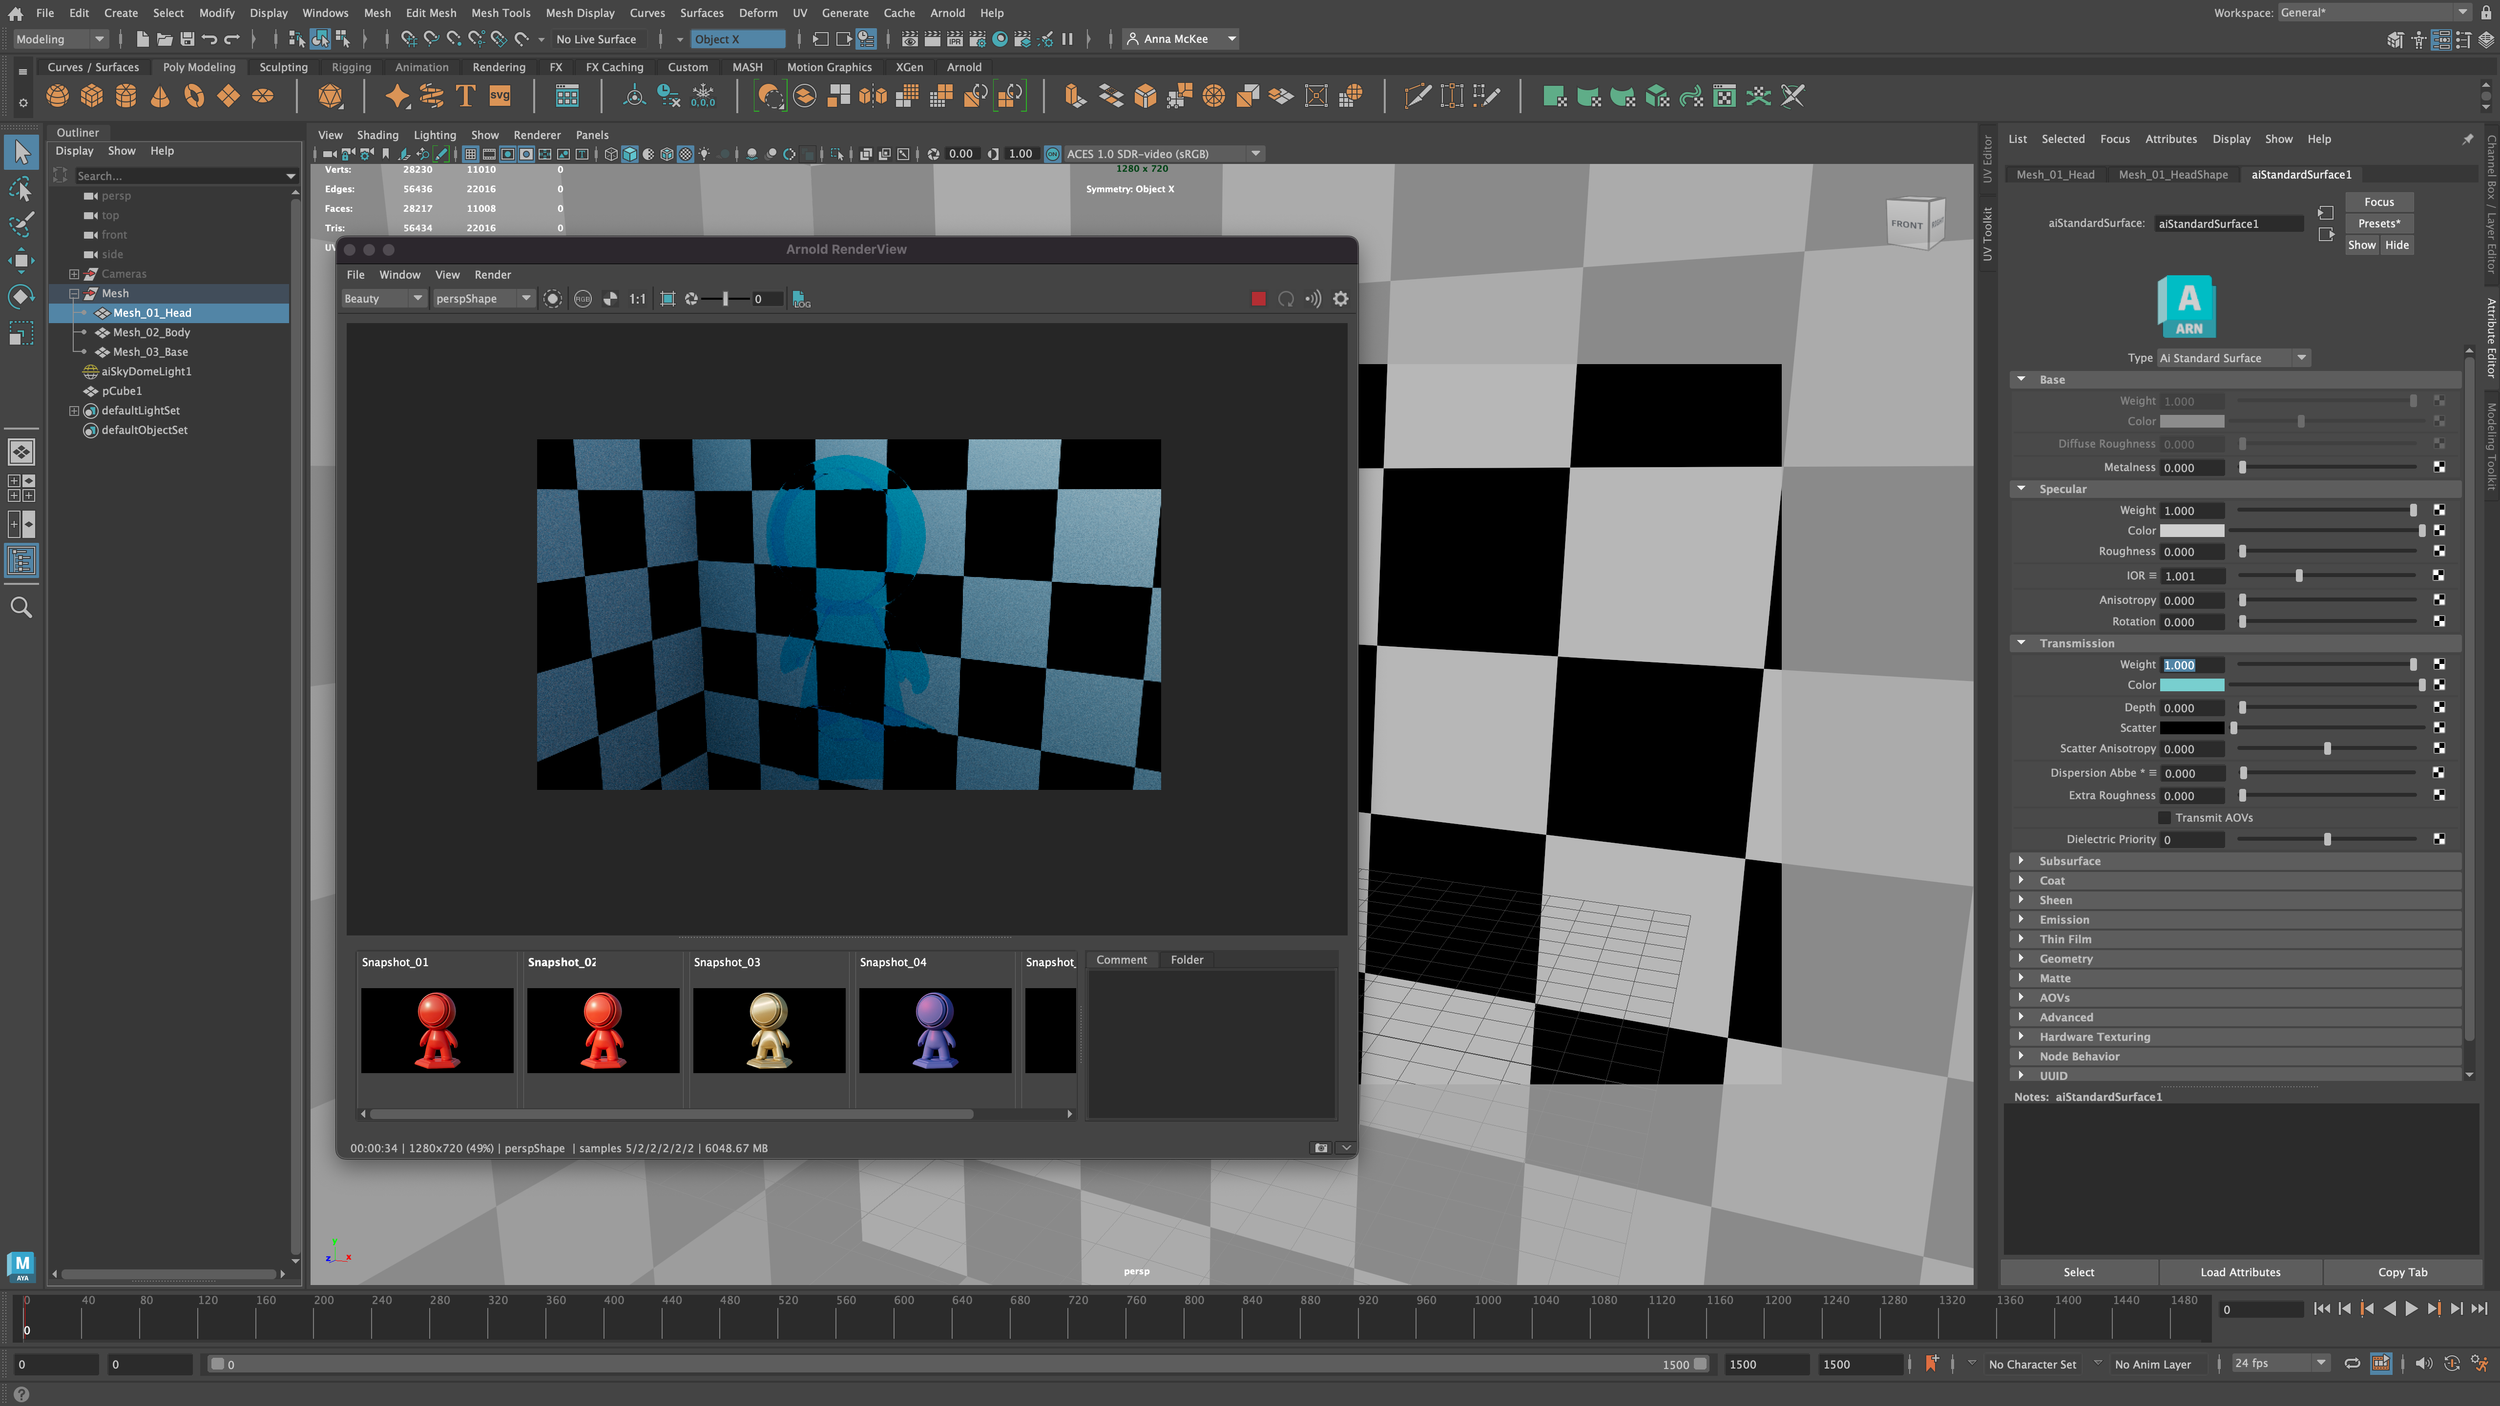
Screenshots: External Tutorial - “Introduction to Maya:” - Esp 50, 51


Maya files credit - FlippedNormals, “Intro to Maya” (ESP 50. 51)
Screenshot Credit: Anna McKee
“This external tutorial allowed me to experiment with colour , transmission, IOR, transparency, metalness, specularity, Subsurface Scattering, Randomwalk, etc”
Final Renders -
External tutorial
Week 7


Maya files credit - FlippedNormals, “Intro to Maya” (ESP 50. 51)
Render credit: Anna McKee
Self-Critique:
If I were to reattempt this tutorial again, I feel that I would like to try and grasp a better understanding of more of the shaders / options available and their varying effects when combined with one another.
I also feel that I may not completely understand all the uses of each of the shaders, although I feel that with much further study and use in general, I will hopefully begin to understand the complexities of each option / how they relate to a final Arnold Render.
Conclusion:
Overall I found that this tutorial was quite complex for me, as I had no previous experience using shaders within Maya, (although during class time we began learning the basics, I fell behind and could not understand many of the important concepts).
In conclusion I found that completing this tutorial helped me to visualise the use / relevance of shaders (especially Arnold shaders), as the video also explained the pros and cons of each shader and how they can be used conjunctively together to create a beautiful, realistic render.

WEDNESDAY SUPPORT SESSION
-
Multiple Topics
Week 7 -
Online - 12:00-14:00, 23rd November 2022
Topics covered within the support session:
HDRI - Using a Skydome to present a HDRI , its uses and benefits for a final render
File types for HDRIs - Use EXT or HDR only
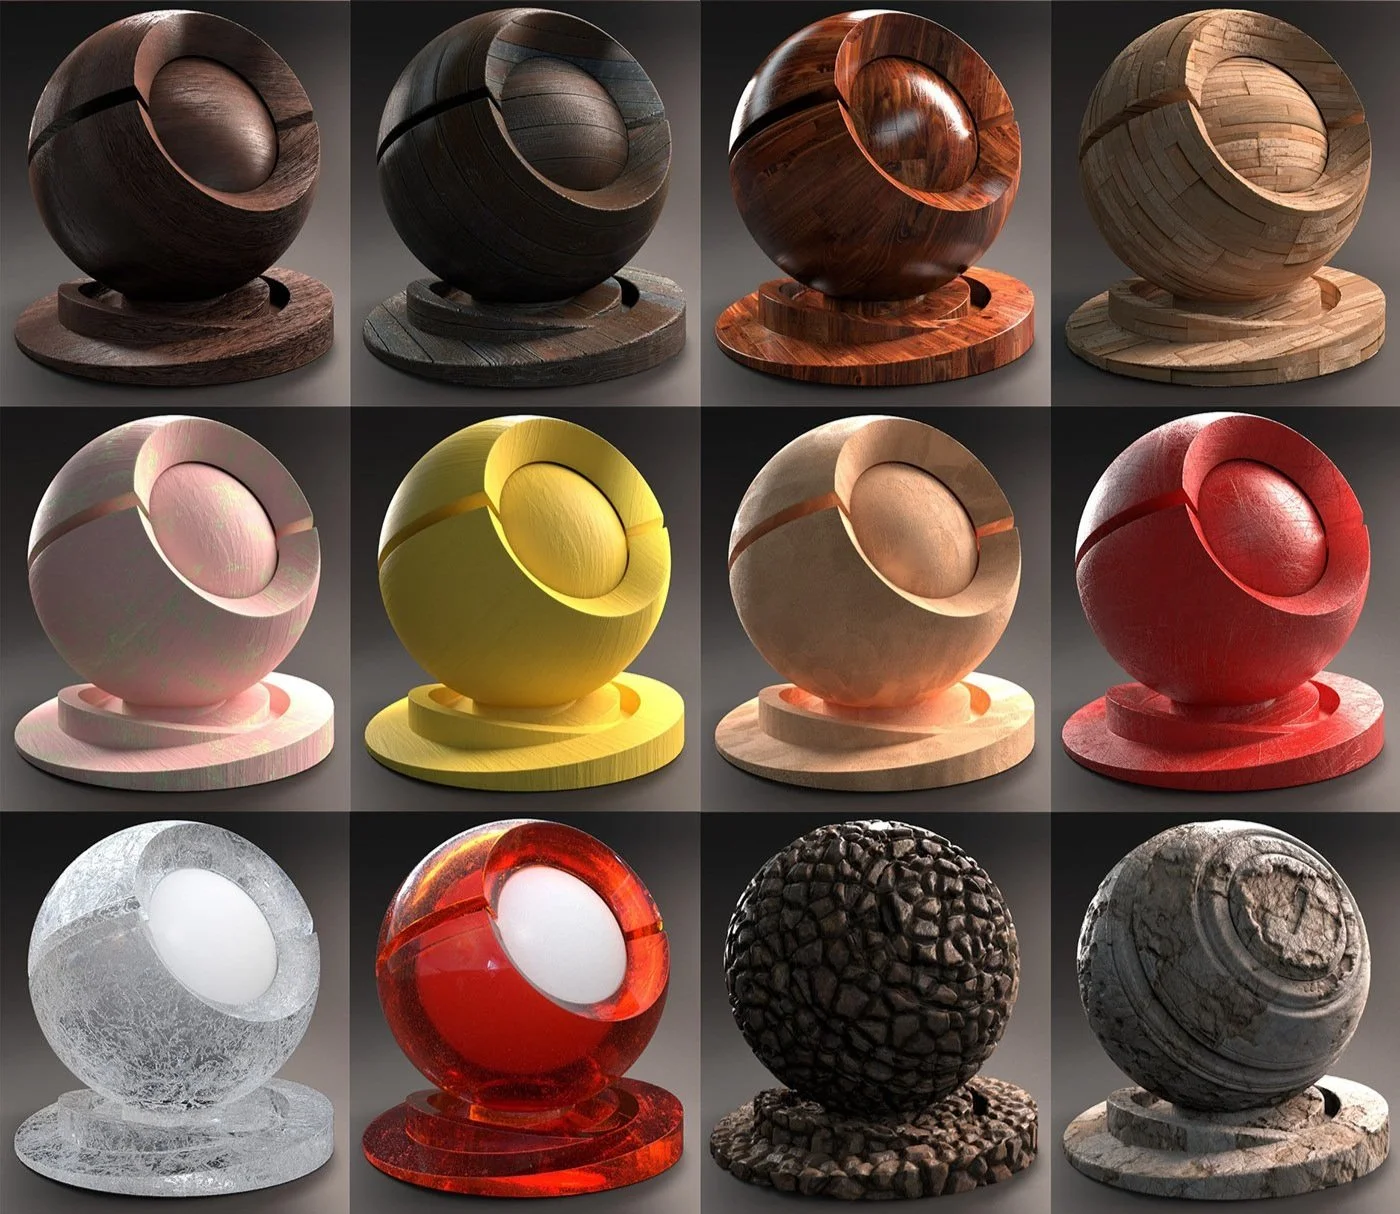
Changing materials: Attribute Editor > Presents > Materials Chart
Creating an “aiWireframe” -
create naming conventions, optimase the scene,
Areas that deserve further research: ID Maps, AOVs, Mesh Clean-up process, how to optimize the scene,
Rules for UV maps: keeping space between UVs and UV Tiles, no overlapping UVs
Preparing mesh for exporting to Substance painter - (List shown directly below)
Note credit: Anna McKee
Steps to consider before exporting mesh from Maya into Substance Painter:


Screenshot Credit: Anna McKee
Centering the mesh -
Allowing it to appear in the center / middle of your scene in Substance Painter
Create a new mesh (ie, cube)
Left click on finalised mesh you want to center (make sure ‘Object’ mode is on)
Shift + left-click on new mesh (ie, cube)
Modify > Snap Align Objects > Select small ‘option’ box > Align objects option
Turn on “Mid”, “World X” and “World Y” > Apply > Align
Alternative method:
Select mesh in ‘Object mode’
Channel Box / Layer Editor
Set Translate X, Y, Z to ‘0’
Clean-up Mesh -
Select mesh you want to clean up
Mesh > Cleanup
Delete history -
Select mesh
File > Edit > Delete by Type > History
Alternative method:
Select mesh
Alt / Option, Shift, D


Screenshot Credit: Anna McKee
Freeze Transforms -
Select mesh
Modify > Freeze Transformations
Alternative method:
Select mesh
Left-click on “Freeze Transformations” blue icon in the “Shelf”
Consider Scale -
Change working units:
Windows > Settings/Preferences > Preferences
Working Units > select preferred working unit
Prepare UV Maps -
No overlapping UVs
UV Islands have a large enough gap between them and the edge of the UV Tile
Check UV Texel density - Make sure that the ‘Checkerboard’ pattern is not skewed, stretched, blurred or pixelated.
Delete unused nodes in Hypershade -
This process will delete all nodes (within the Hypershade) that are not joined:
In Hypershade > Edit > Delete Unused Nodes


Screenshot Credit: Anna McKee
Create naming conventions -
Outliner > Double Left-click title of object / light / etc to rename
Try to rename meshes as soon as possible, as this will help with ease of workflow / finding objects.
Optimase the scene -
File > Optimize Scene Size >
23/11/2022 -
Conclusion:
Overall I found todays support session to be quite intense and fast-paced, as there were many important topics covered such as “How to prepare a mesh for exporting (specifically from Maya to Substance Painter)”. This is a topic that I have previously had little awareness of and was unsure of the overall process, therefore I was pleased that I was made aware of the importance of this subject (as it will be relevant to the creation pipeline of my final models).
Although I still feel that I would need to complete my own extended self-study research related to these topics, the session today provided a great insight into a wider variety of processes that I would need to cover within my own time, (as I soon realised that the procedure of exporting a model from maya to Substance Painter would not be as simple as I had previously thought).
Personally I found that the most helpful part of the support section today was when our tutor (Richard) revised over the importance of “Preparing UV Maps” before exporting to Substance painter. For example, we need to make sure that there are no overlapping UVs within our UV tile, as this could affect the presentation of the textures placed within Substance Painter.
In conclusion I was greatly appreciative of the topics covered within the support session today, as it has really opened my eyes to the complexity and importance of checking/preparing your model / UVs before exporting into Substance Painter, (which is an extremely important part of the 3D Production Pipeline).
Internal Tutorials - AI STANDARD Surface Shader
Week 7
Internal Tutorial 1 - Setting up the scene for material testing


Render + Screenshot Credit: Anna McKee


Screenshot Credit: Anna McKee
Internal Tutorial 2 - AI STANDARD SURFACE Base Layer


Render + Screenshot Credit: Anna McKee


Screenshot Credit: Anna McKee
Internal Tutorial 3 -AI STANDARD SURFACE Base Layer Metalness


Render + Screenshot Credit: Anna McKee

Screenshot Credit: Anna McKee
INTERNAL TUTORIAL 4 - AI Standard Surface Specular Layer


Render + Screenshot Credit: Anna McKee

Screenshot Credit: Anna McKee
INTERNAL TUTORIAL 5 - AI Standard Surface Transmission Layer


Render + Screenshot Credit: Anna McKee


Screenshot Credit: Anna McKee
Conclusion - INTERNAL TUTORIALS - AI STANDARD SURFACE SHADER
WEEK 7
Self Critique / Conclusion:
Personally I would have liked to complete the entire follow-along Internal tutorials, as I felt that I was able to learn at my own pace, experiment and create my own final render results.
I feel that I absorb the learning material best when I am able to sit and study within a quiet space, which is why I feel that I was able to progress slightly faster with these internal class tutorials when compared to our fast-paced Monday class, (although I am beginning to understand Maya’s complicated Interface a little bit more).
The reason why I am not able to finish studying all of these internal tutorials is because I need to continue the sculpting process of my bird within my “Digital Studio Practice” Group Work. This is currently an important issue at present as I have a short deadline and I do not want to let my group down.
Overall, I thoroughly enjoyed following-along these selected tutorials (AI STANDARD SURFACE SHADER), as our tutor Richard was able to demonstrate and simplify the scientific properties of PBR shaders within Maya, presenting his workflow / advice in a clear and readable manner.
I feel that these videos are an important building-block for my own research and understanding, especially when applying these shaders to my own final pieces.
Self reflection
Weeks 6-7
Personally I have found that these past two weeks (Weeks 6-7) have been very intense and fast paced. Although I did find that Retopologizing was a ‘slightly’ more understandable topic, as I had some previous experience with it before (although only in Blender).
One of my main worries is trying to understand how to ‘plug-in’ selected maps in to their correct shader/material node within the Hypershade. Personally I struggled to completely understand / recreate this process during class time (21/11/2022), although I did reattempt to partake in further research regarding this topic, I still feel that this is an area that would need more personal experimentation.
I am also still struggling with time management, as I am finding it difficult to sustain completing the blog, group work (DSP) and beginning my own final characters.
I also find that I usually fall-behind in class on Mondays and that I need to spend the next 5-6 days just ‘catching-up’ with the classwork that was discussed. Therefore I am realising that I have now began to worry continuously about not being able to complete my two characters for my final piece.